I just realized I haven't posted in quite a while. That's because I'm slowly adjusting to a new healthy eating plan, and figuring out recipes is a little time-consuming, so I haven't been cooking as much. Here's a little run-down of what I typically eat, for anywhere between 1300-1600 calories per day:
Breakfast is almost always the same thing, because I'm too lazy in the mornings to actually cook. I toast a slice of Ezekiel Bread, smear it with a little fat free cream cheese, either some Marmite or Sriracha sauce, and top with a fried egg, over easy. If I have a little more time I'll have a fruit smoothie or a bowl of fruit salad.
Lunch is different just about every day. If I have leftovers, that's my preference, but usually I don't (due to the lack of cooking lately), and a lot of the time, I eat out. When eating out, I usually stick to salad (I love Jason's Deli's salad bar!) or if I'm eating at work before a shift, I'll have a white meat chicken sandwich and toss half the bun. Today I had a tuna caesar wrap: A Flat Out wrap with tuna salad (tuna, teaspoon mayo, tablespoon salsa, celery and sweet peppers) and Lite caesar salad. I've also got a broccoli salad marinating in the fridge for a pre-work snack (broccoli florets, walnuts, and dried cranberries tossed in a homemade vinaigrette).
Dinner is the tricky part. Cooking a whole meal just for me is becoming tedious, and I only spend dinner at my boyfriend's house once or twice a week. I did pick up some chicken at the grocery store today, and I'm planning to bake it with some salsa, shred it, and make it a few different ways over the course of a week. I may or may not make a post with the recipe, but it's so simple I'm leaning towards "may not".
I don't like desserts, and my meals and snacks are usually the same thing (I will eat parts of one meal throughout the day instead of sitting down for three different things at one time), so keeping my calories low is pretty easy. I realize I don't have many readers yet, but I would love to hear feedback about what sort of recipes you'd like to see me feature on my blog! Even though I may not have much time for cooking at the moment, school is almost over, so I am storing up ideas to make over the break.
This Saturday I'll be at Pepper Place Farmer's Market around 9:00 if anyone would like to join me, and hopefully all the lovely fresh produce will inspire my next recipe.
Wednesday, April 28, 2010
Friday, April 16, 2010
Clean-Out-Your-Fridge Lettuce Wraps
So, in the past few weeks I have been a little overzealous in my grocery shopping. I bought lots of veggies with no specific plans as how to cook them, and now they are slowly withering away in silence in my refrigerator. There can be only one solution to this waste of money: A stir-fry. Now, this is not a typical stir fry, and it is by no means authentic to any specific cuisine. It's just a fast, easy, and delicious way to get rid of a lot of veggies that may be a little past their prime.
Now, I'm going to bare my soul a little bit here and let you see the inside of my fridge...
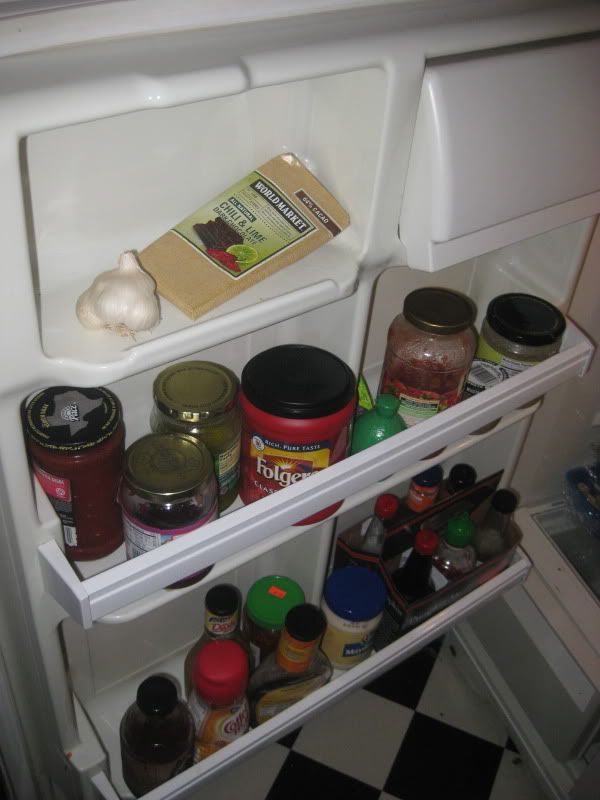


Now, I'm going to bare my soul a little bit here and let you see the inside of my fridge...
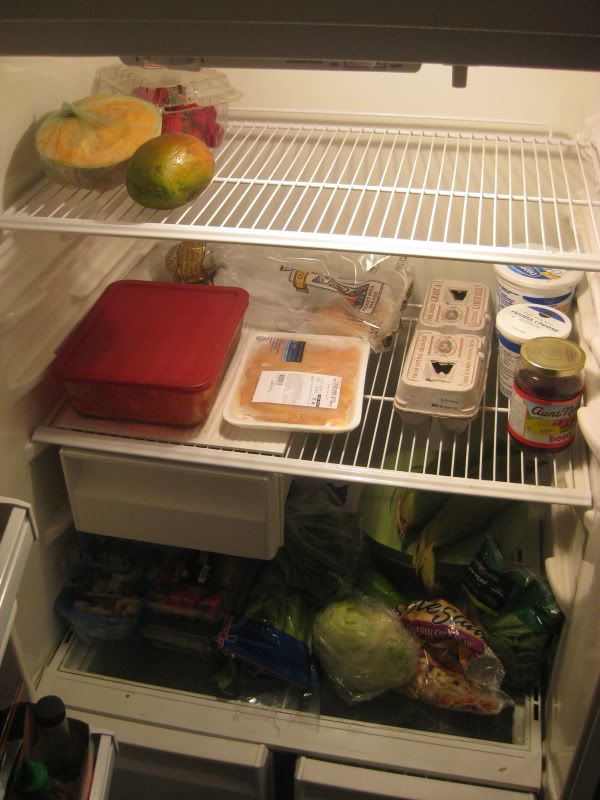
See that bottom shelf there? Nothing but veggies that are slowly dying. So, we're going to chop them up and put them out of their misery!
For this recipe, you can literally use anything you want. Whatever you have left over is fine, even frozen veg will work. I would definitely stay away from canned veggies, but those will last forever, anyway, so you're safe. You can make this vegetarian, or you can add whatever kind of meat you have on hand. I had some chicken strips, so I diced up 4 oz of chicken into the teeniest bits I could muster, threw them in a quick Mrs Dash marinade, and popped them in the fridge while I prepped my veg.
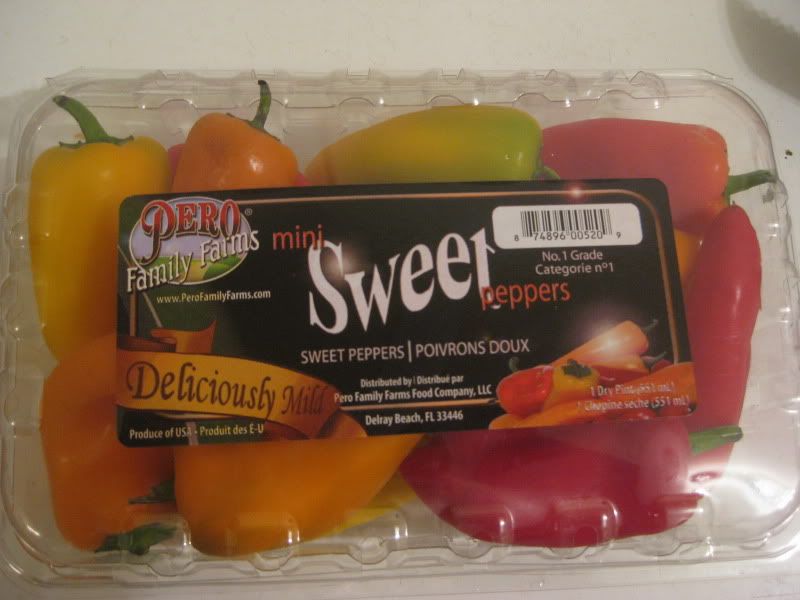
These guys are my favorite things in the world:
I put them in almost everything I cook, and they are SO delicious! They will never go bad in my fridge. I diced up 3 or 4 of them, one of each color.
Even this FrankenChili didn't escape my knife! I did spare his little mutated twin, though. He was a bit shrivelled.
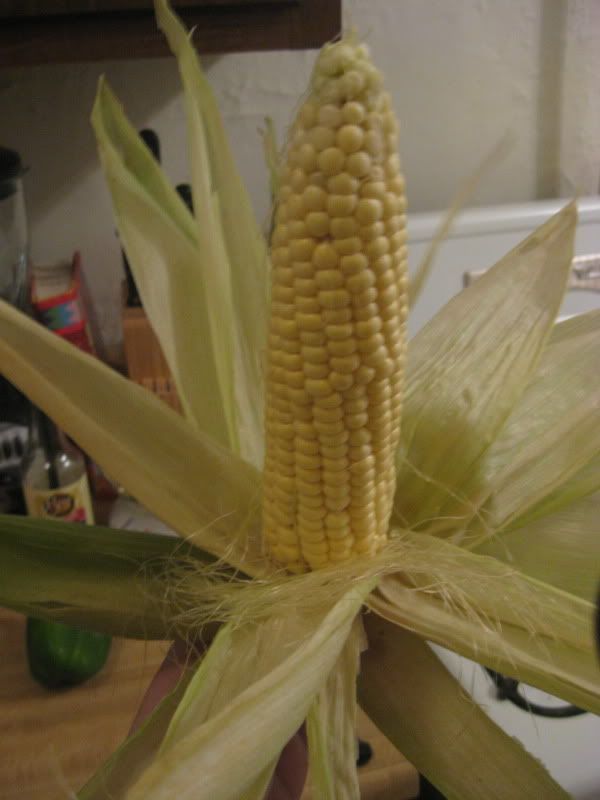
It may not be corn season yet, but I bought this guy on a whim and it's been about a week so I figure he's gotta go in the pot, too. Now I have corn silk all over my kitchen. Oh, and Nugget the Cat got hold of one of the husk leaves and it's her new favorite toy ever. My cats are cheap dates.
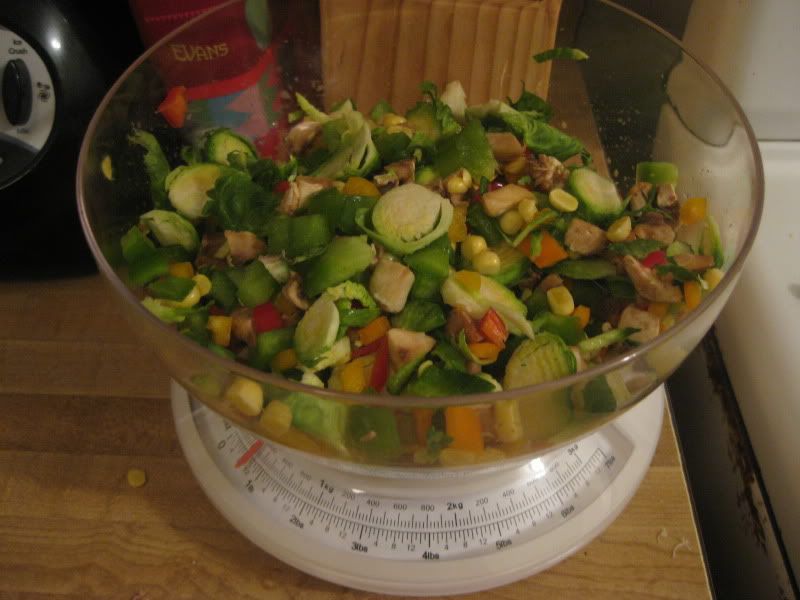
Here's all the veggies ready to go. There are a handful of diced white mushrooms in here, about 4 stray brussels sprouts, an ear of corn, half a regular green bell pepper, and 3 or 4 small sweet peppers. I would have added some shredded cabbage but I forgot, so it continues to wilt on the bottom shelf.
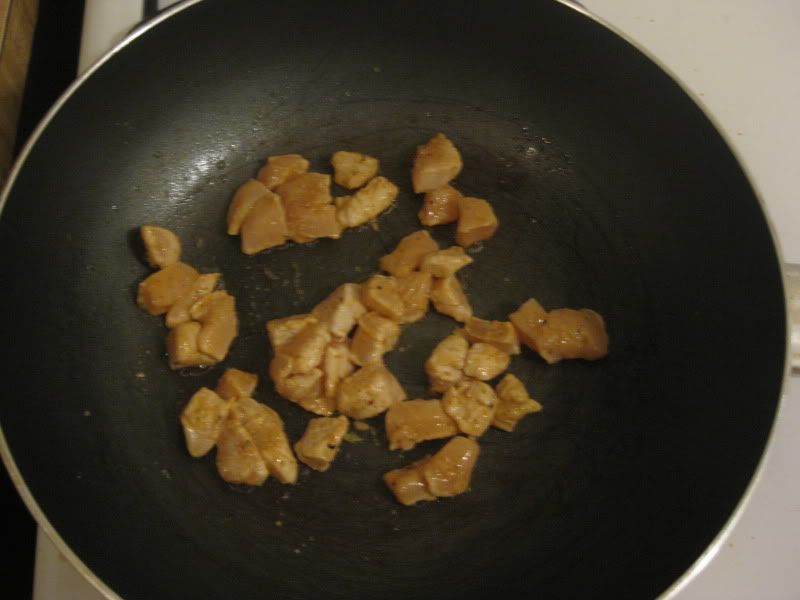
Now it's time to get cracking. I turned my skillet to medium-high, sprayed some Pam (feel free to use oil, but I'm on a diet), and added my chicken.
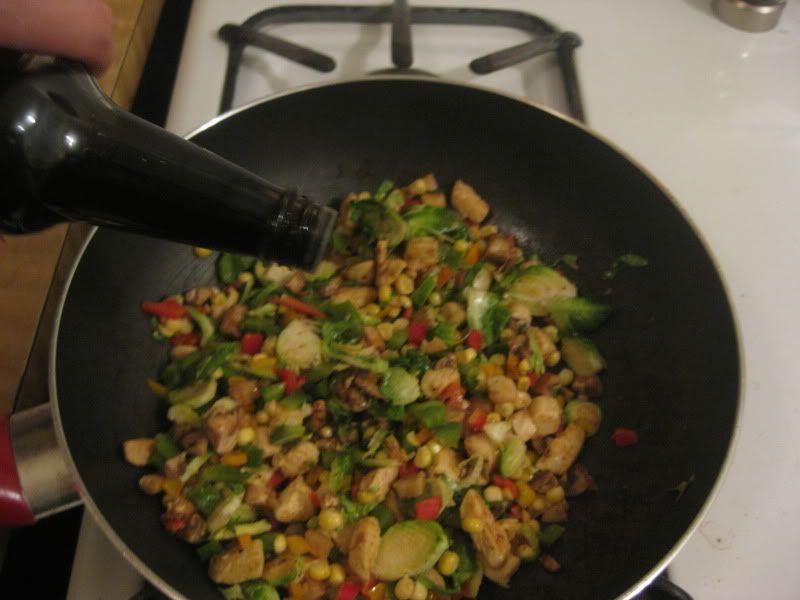
When the chicken had a nice sear going on, but before it was done cooking, I added my veggies. Now, in a traditional stir-fry, you'll add your veggies in order of how long they take to cook. But remember, I warned you that this was not traditional.
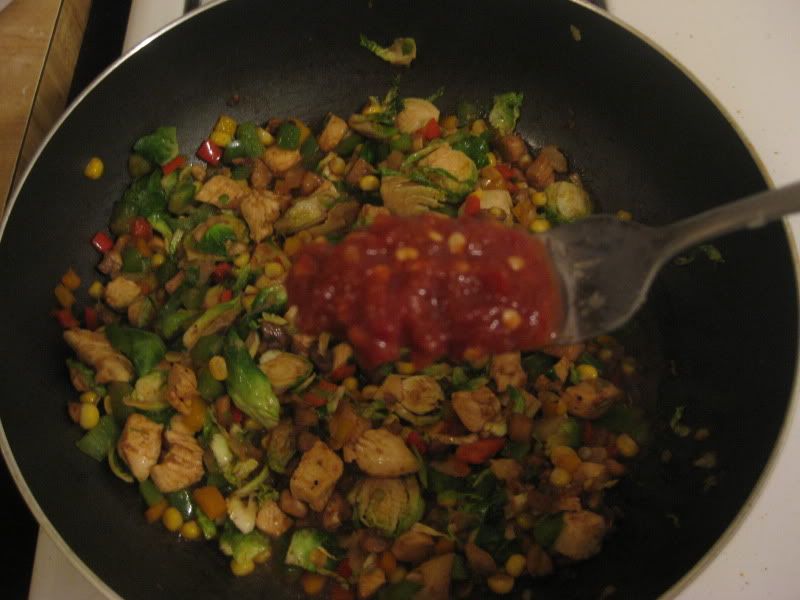
Now add some soy sauce, about 1-2 tsps (3 good shakes).
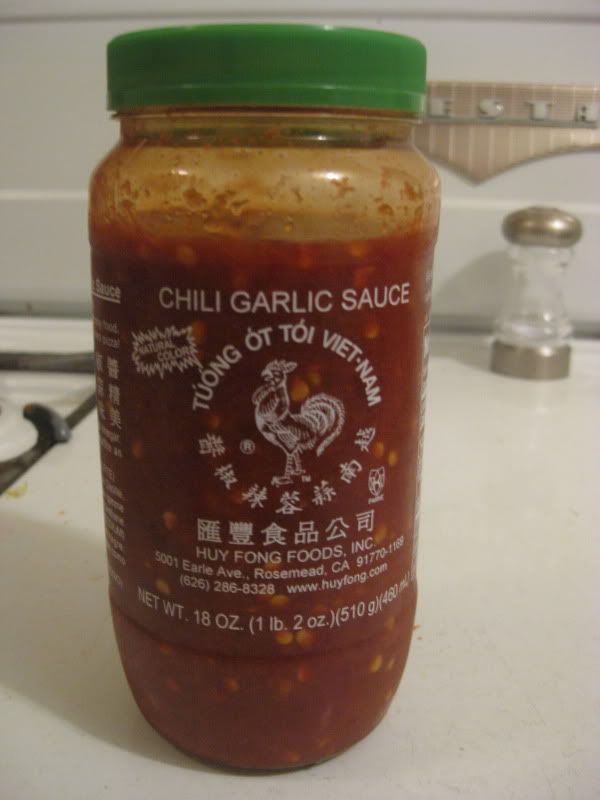
Now, if you like things spicy, this is the way to go. You can find this stuff at any Asian market, and I've seen it at World Market, but I'm not sure about supermarket availability. But trust me, it's worth an extra trip. Chili Garlic sauce, and it's so crazy spicy it should be illegal!
This one forkful proved to be a bit much. I liked it, but I am insane. If you're not a fan of crying through your meals, maybe cut this down by half, or omit altogether.
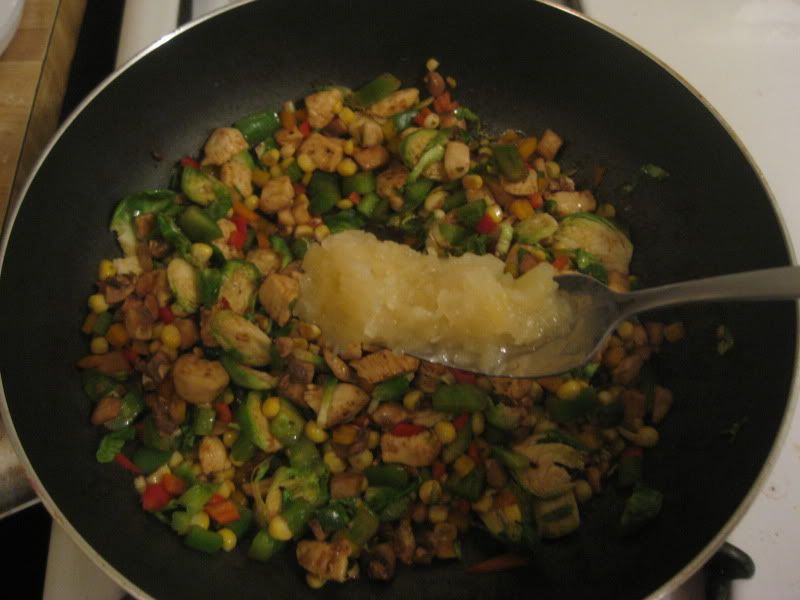
Now for my secret weapon:
Yes, it's crushed pineapple. I put it in all of my stir-frys. Some people use honey as a sweetener, but I like the pineapple. It's not too sweet, it's all natural, and it's a great texture for this kind of dish. I added three forkfuls. (I'm using a fork instead of a spoon for this stuff because I'm trying to avoid adding too much liquid, which will only steam the veggies and not let them stay crisp.)
Keep stirring for a few minutes, or until all of the liquid (from the soy sauce and the liquid released from some of the veggies) is gone. It's best to let this cool down a bit, as the heat will somewhat wilt the lettuce, but I was hungry so I went ahead and plated up.
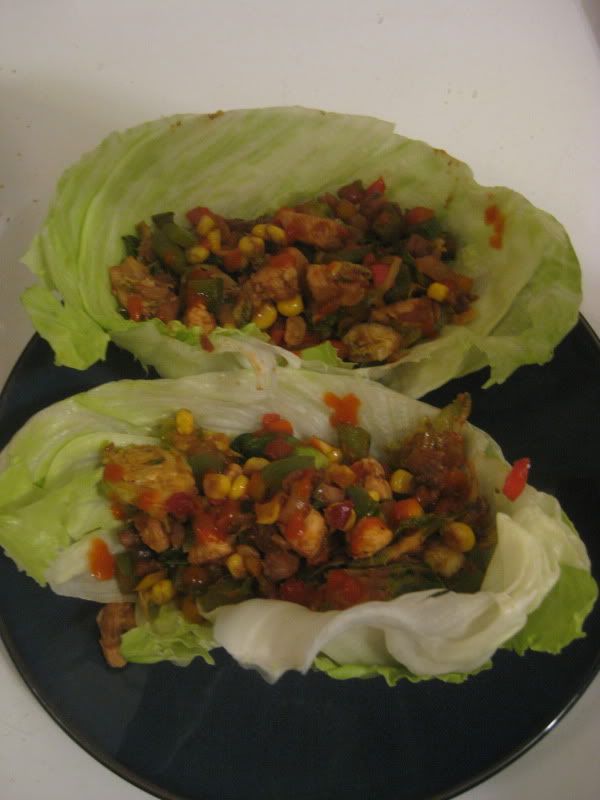
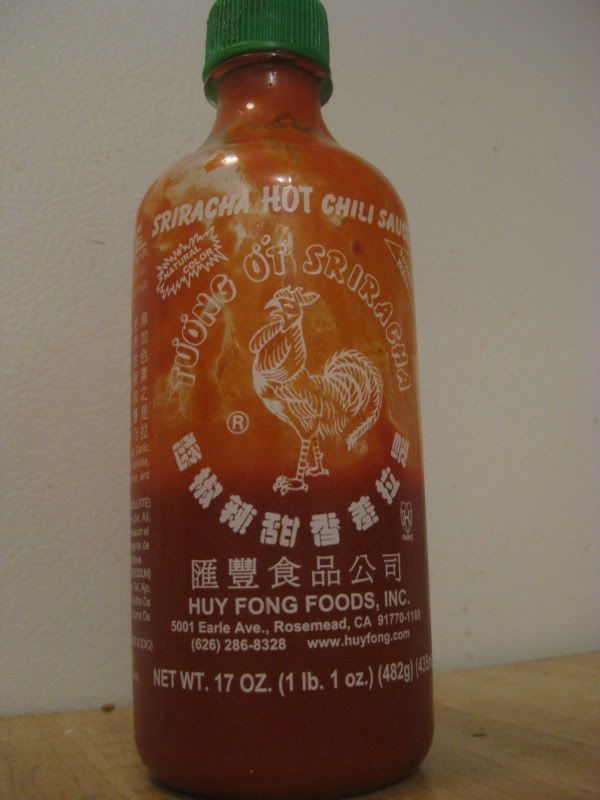
Add a few spoonfuls to a double-thick leaf of iceberg lettuce and roll up like a taco to eat. But not before adding my very best friend, Mister Sriracha Sauce!
I've had this bottle for a month and it's more than halfway gone. I would sprinkle this stuff on my cereal, it's so good! Again, if you can't take the heat, stay far away.
That's it! Fridge cleaned out, belly full, sinuses clear (ew). This should have served two, but I was hungry, so I ate both pieces and there was a little less than half the veggie mix left over. It'll go great in an omelette! But the whole entire pan of stuff only clocks in at 400 calories, so eat to your heart's content!
Thursday, April 15, 2010
Italian Eggplant Bake
I call it eggplant parmesan, but after viewing more than a few eggplant parmesan recipes online for comparison, I realize that this dish is not eggplant parmesan. Even calling it "Italian" is a bit of a stretch, but it's the most apt title without getting overly descriptive. "Eggplants, Cheese, and Sauce Baked in a Casserole" doesn't exactly roll off the tongue, but that's as accurate as I'll get.
To start, I must address the fact that some people do not like eggplant. In fact, I'm realizing more and more that some of my favorite foods lie on the fringe of what most people call "good eats". The simple fact of the matter, though, is that eggplant is good for you. It's loaded with fiber, has very few calories, and is hearty enough to substitute meat in many dishes, if that's your thing. So if you'd like to give eggplant a try, this is definitely a good starter dish. It's easy, and the flavors of the cheese and sauce pretty much cover up whatever flavors you might find disagreeable.
We'll start with the ingredients:
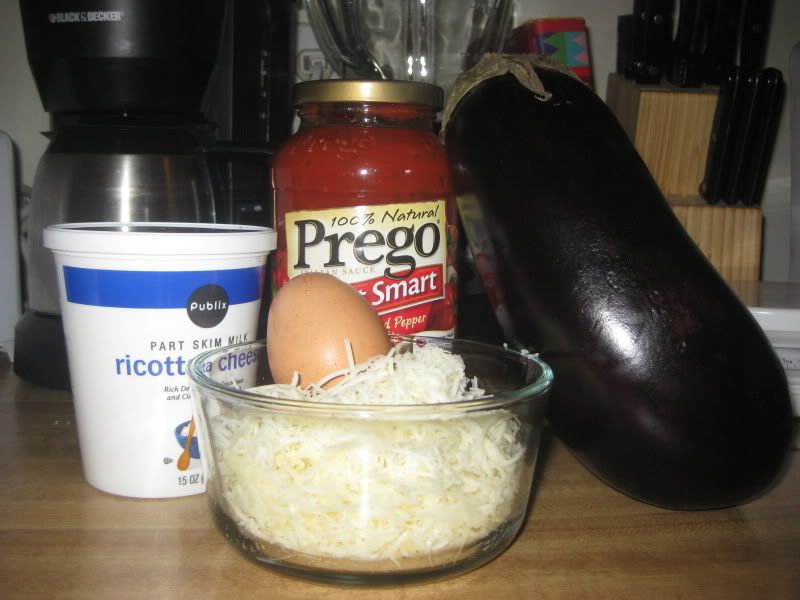
An eggplant (duh!), a jar of your favorite tomato-based pasta sauce (you won't use the whole thing), ricotta cheese (about 1/4 cup, but be warned I didn't measure a single thing for this entire recipe), 1 egg, and about 13/4 cup shredded Italian blend cheese.
Now for those of you who have never dealt with this strange purple fruit (vegetable?), here's how you go about tackling it:


To start, I must address the fact that some people do not like eggplant. In fact, I'm realizing more and more that some of my favorite foods lie on the fringe of what most people call "good eats". The simple fact of the matter, though, is that eggplant is good for you. It's loaded with fiber, has very few calories, and is hearty enough to substitute meat in many dishes, if that's your thing. So if you'd like to give eggplant a try, this is definitely a good starter dish. It's easy, and the flavors of the cheese and sauce pretty much cover up whatever flavors you might find disagreeable.
We'll start with the ingredients:
An eggplant (duh!), a jar of your favorite tomato-based pasta sauce (you won't use the whole thing), ricotta cheese (about 1/4 cup, but be warned I didn't measure a single thing for this entire recipe), 1 egg, and about 13/4 cup shredded Italian blend cheese.
Now for those of you who have never dealt with this strange purple fruit (vegetable?), here's how you go about tackling it:
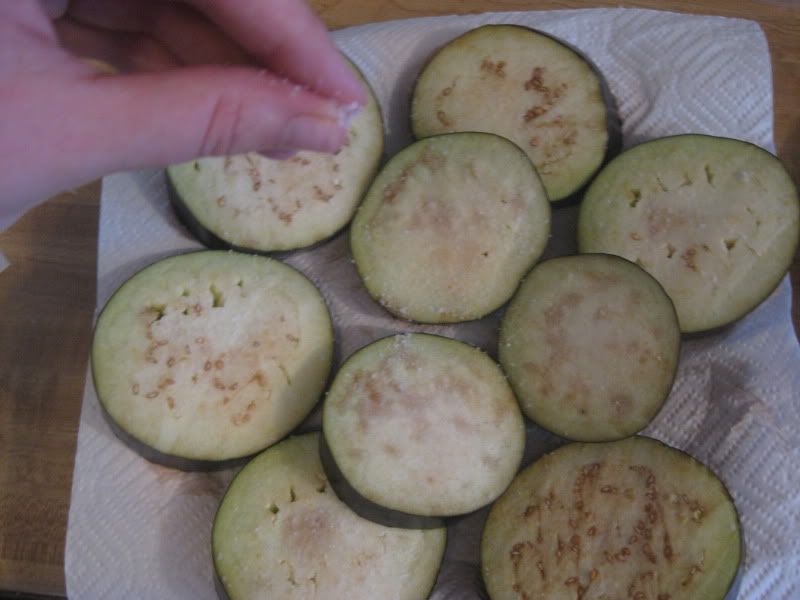
Slice off the very top and the very bottom, then cut the rest of it into 1/2-inch thick slices. See all those little brown seeds? They stay. You won't mind them. Lay the slices out on a sheet or two of paper towels (or a clean dishcloth, if you're more environmentally friendly than me) and sprinkle liberally with salt. Go to town with the salt! The salt draws out a lot of the moisture from the eggplant and with it, the bitter flavor. Salting it makes it much more mild. Don't worry, you'll rinse it all off later.
Salt both sides of each slice, then top with another paper towel (or dishcloth) and another plate, or anything to add weight. You'll want to lightly press the eggplant for about 30 minutes, then rinse the salt from the slices. Arrange the eggplant on a cookie sheet or roasting pan and bake in a 350 degree oven for about 10-15 minutes, or until tender.
For those of you interested in my infamous eyebrow-exploding oven, here's how I preheat the thing:
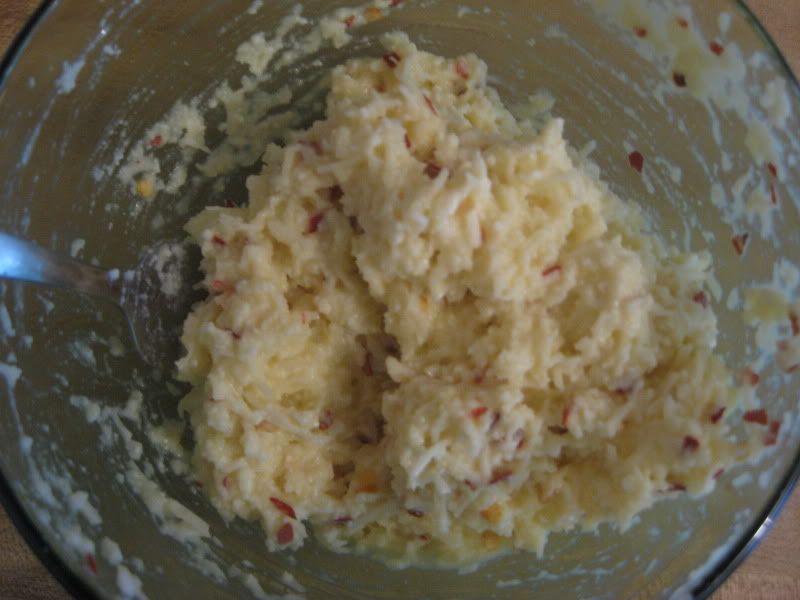
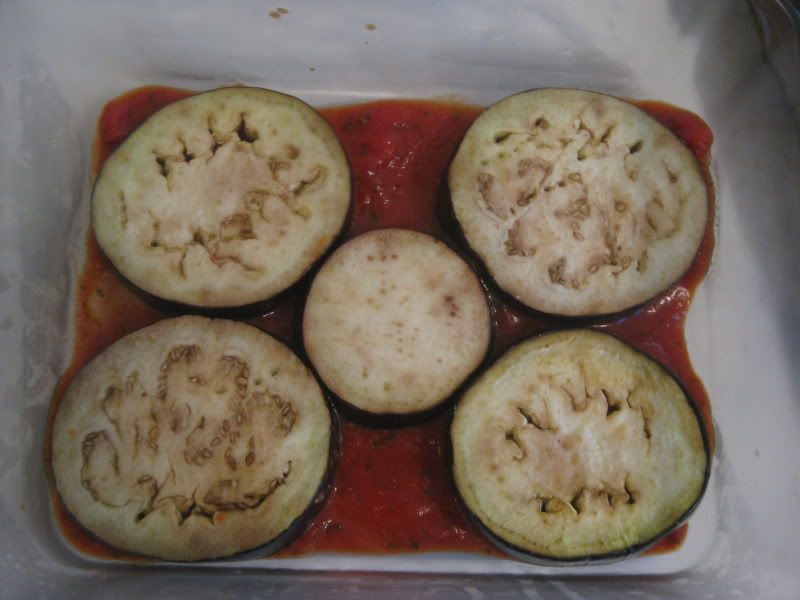
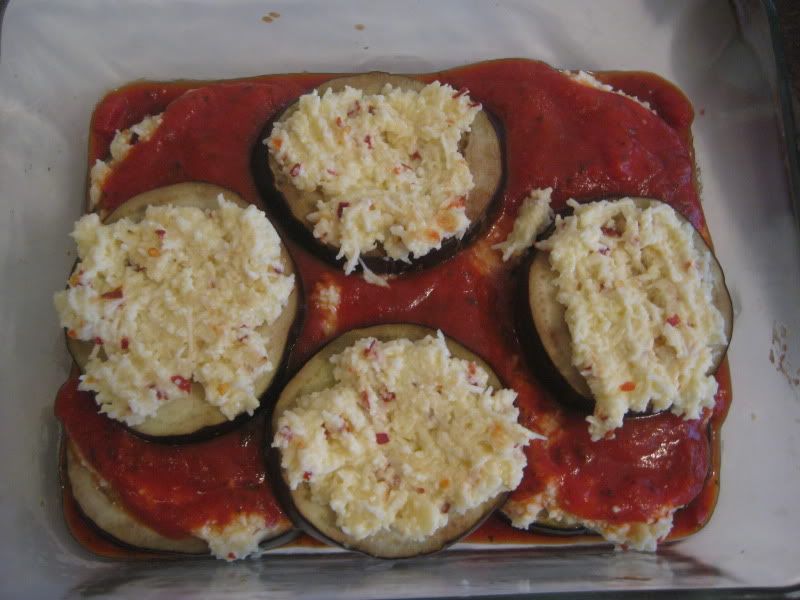
While your eggplant is roasting, you can prepare the rest of the ingredients. Spoon a thin layer of sauce into a casserole dish. I used a 9x11, but just use whatever size you have. I only have one casserole dish, poor me! Then, beat your egg (I scooped out half of the yolk, because I'm idiotically trying to save calories in a dish that will shortly be covered and dripping with cheese) and add the 1/4 cup ricotta and 3/4 cup Italian blend cheese. I also added some crushed red pepper flakes because I'm spicy.
Gross.
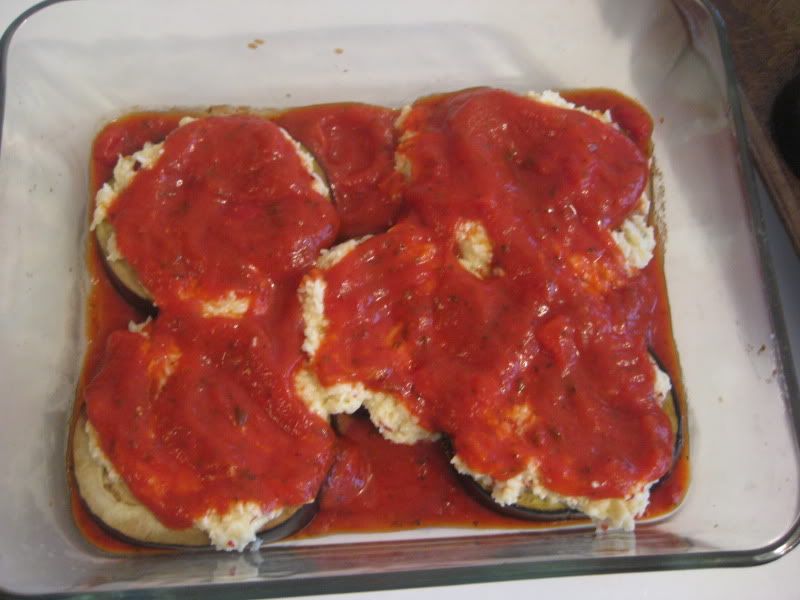
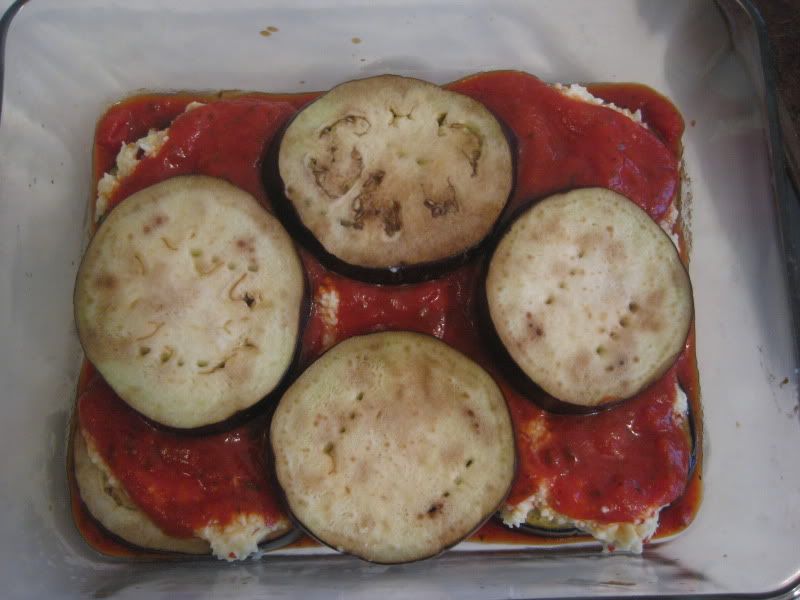
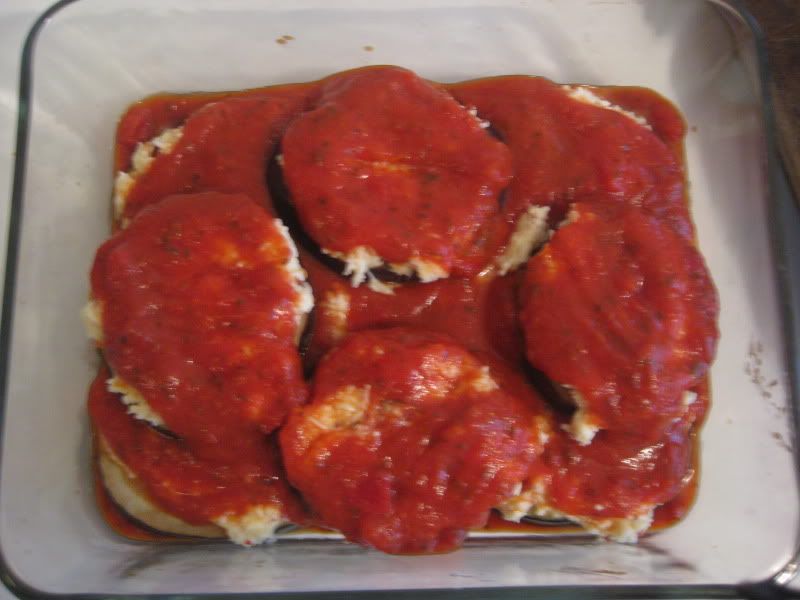
Oh, look, your eggplant is done! Time to form the assembly line. Okay, you've already got sauce in your casserole, you've got your eggplant nice and roasty, you have extra sauce nearby, and you have your cheesy cheeses at the ready. Now let's just let the pictures do the talking!
Done and done! That last layer is just Italian blend cheese. That guy is your egg timer... when he turns nice and golden brown and bubbly, your Eggplant Bake is ready! So pop that guy right back in the 350 degree oven, and give it roughly 10-15 minutes.
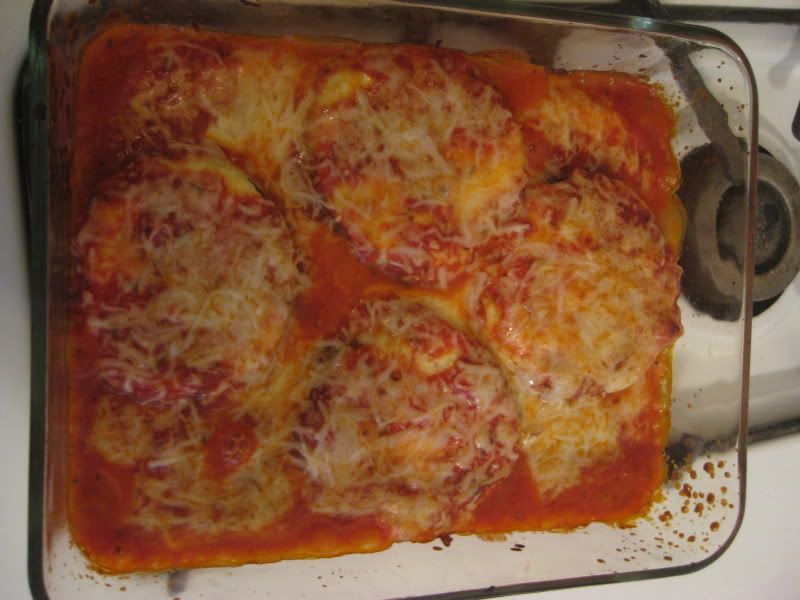
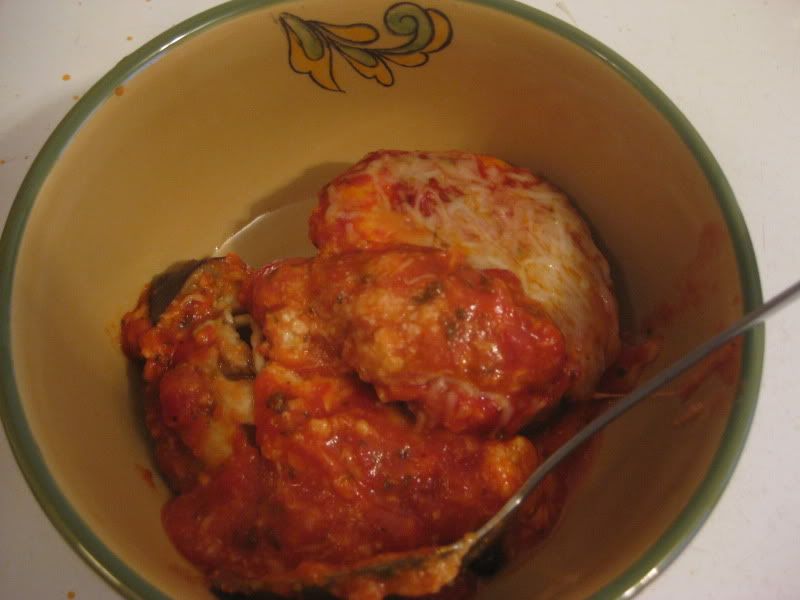
Whoa! That just gets me drooling all over again. I actually would have liked for this to get a little more brown on top, but that would have been easily remedied by sprinkling some straight-up parmesan cheese over the whole thing, which I did not have on hand. Still tastes wonderful!
Okay, it might look like slop, but in my opinion, most good foods do. The eggplant was so tender, I ate this with a spoon. This would go marvelously with some steamed broccoli or a big green salad, but I was in a hurry so I shoved half of this into a mini pita and went to town. Leftovers make great sandwiches, by the way!
Okay folks, I hope if you're an eggplant lover this has inspired you to revisit an old friend, and if you're eggplant-suspicious, maybe this recipe will open new doors of purple fruit-veg heaven!
Monday, April 12, 2010
Panera Bread: Making Lunch Easy!
I went to Panera Bread today for lunch, and instantly saw something new on their menu: calories! Yes, Panera Bread has listed the calorie count for each and every menu item, right there in plain sight, so I didn't have to guess exactly how healthy my lunch would (or wouldn't) be.
While I was surprised to see this change so early, I knew it was coming. As a part of the new healthcare bill, all restaurants in the US with more than twenty locations will now be required to post calorie counts for every item on their menus, starting in 2011. In New York, this change has already been implemented, and I can only assume that Alabama will be the last to join the ranks, as we just generally like to oppose all change.
Just think what this is going to do for the restaurant industry! If you could clearly see, at the same time you order, that your Big Mac, fries, and Coke has a total of 1,410 calories, would you still eat it? Even for those who don't need to watch their weight (those who generally don't eat at McDonald's anyway), that is simply a shocking number! Surprisingly, most full-service restaurants don't fare much better. Many entrees at leading chains have more than 1,000 calories per dish, and that includes some items that are perceived to be healthy, like salads. Want a cobb salad at TGI Friday's? You'll be taking in nearly 1,250 calories. It's true that many people don't care about how many calories they consume, but in this weight-conscious society, I believe that restaurants will either have to find ways to lighten up their recipes, or simply offer alternative, low-cal menus in order to compete, now that all their dirty laundry has been aired.
Back to Panera Bread. I found that seeing the calories for each menu item did affect my selection, though only slightly. Panera consistently offers healthy, fresh foods, and almost all of their menu items were under 400 calories each. I had a sandwich and soup combo, the Turkey Artichoke panini with a cup of black bean soup, and the entire meal cost me a total of 480 calories. I try to keep my calories at about 1,600 per day, so this fit very nicely into my diet!
So keep an eye out for those calorie counts... they'll be showing up in your neck of the woods soon, and I'd love to hear how they affect your dining choices, whether you are watching your weight or not!
Saturday, April 10, 2010
New Header!
Much thanks to Alena for making this gorgeous header for me! She is my blogging guru... I couldn't do it without her!
Friday, April 9, 2010
Palak Paneer
I made palak paneer a few weeks ago, but it's still one of my favorite culinary accomplishments, so I'd like to share the recipe with you. It may seem a bit adventurous, and it's definitely time consuming, but it's a whole lot of fun and it's actually very easy to make!
For those of you unaccustomed to Indian food, palak paneer is a very common vegetarian dish. It can be a side dish or an entrée, depending on serving size, and the flavors are mild enough to be appealing to just about everyone. Palak is a kind of homemade cheese, and paneer is spinach, so this dish is very similar to a creamed spinach with cheese that should be somewhat familiar to all palates.
To begin, I made the paneer from scratch, but if your time is limited, you can buy it pre-made from your local Asian market. I definitely recommend making it yourself, though, as it's fun and easy and you'll forever after be able to say that you made cheese from scratch in your own kitchen!
To make the paneer:
For this recipe, I used a half-gallon of whole milk. Pour it into a large stock pot and heat at medium-high until nearly boiling.

Just before the milk comes to a complete boil, turn the heat down to low and add 1-2 tsps of lemon juice or vinegar. I used lemon juice, but I doubt there's much of a difference. Stir the milk and eventually, curds will appear.


Here comes the sinful bit... add 1/2 cup Half and Half. Sure, you could use yogurt or even skim milk if you're watching calories, but the Half and Half really gives this dish its creamy texture.


And you're done! Serve alone or over basmati or jasmine rice, as a side or as a main dish. This is creamed spinach to the max! If this is your first experience with Indian food, it's a great starter, and if you have grown up with Indian food, this is a great comfort dish. It may be time consuming, but it's well worth the effort. Make it with someone you love, and enjoy the bonding experience!
For those of you unaccustomed to Indian food, palak paneer is a very common vegetarian dish. It can be a side dish or an entrée, depending on serving size, and the flavors are mild enough to be appealing to just about everyone. Palak is a kind of homemade cheese, and paneer is spinach, so this dish is very similar to a creamed spinach with cheese that should be somewhat familiar to all palates.
To begin, I made the paneer from scratch, but if your time is limited, you can buy it pre-made from your local Asian market. I definitely recommend making it yourself, though, as it's fun and easy and you'll forever after be able to say that you made cheese from scratch in your own kitchen!
To make the paneer:
For this recipe, I used a half-gallon of whole milk. Pour it into a large stock pot and heat at medium-high until nearly boiling.
Just before the milk comes to a complete boil, turn the heat down to low and add 1-2 tsps of lemon juice or vinegar. I used lemon juice, but I doubt there's much of a difference. Stir the milk and eventually, curds will appear.
You may have to stir for quite a while. I misread the recipe I was following, so I ended up stirring my milk for nearly half an hour, but if you do it right (do not remove the pot from the heat source!), your curds and whey will eventually separate. When they whey (the watery stuff) is completely clear and no longer looks like milk, you're ready to go. The whey will take on a greenish tint and look like water, and the curds will resemble cottage cheese.
When the curds and whey are completely separated, pour the lot into a bowl lined with a cheesecloth doubled over several times. Let it drain for a while, then when it's cool enough, start to squeeze the liquid from the cheesecloth. When you've squeezed all you can, hold the curds under a running faucet and rinse, squeezing the cheesecloth often. Your goal is to rinse the curds while eliminating as much moisture as you can. After a few minutes of rinsing, your curds are ready to be formed into cheese.
The next step is to form the cheese into a block and apply weight. I molded this into a rectangle, but you can make a wheel or pretty much any shape you'd like. At this point, it's the consistency of Play-Doh so it's pretty easy to mold. You can also add any spices or seasonings you'd like at this stage. I left mine plain, but feel free to experiment. Once you've molded the cheese, you need to add some weight and let it sit at room temperature to let the last bit of that stubborn whey drain out. I put my cheese between two plates and set a pot on top that was filled with water.
Let this sit for 2-3 hours or until the cheese is very firm. When it's done, unwrap the cheesecloth and cut into 1" cubes. Hey, guess what? You just made cheese! In your very own kitchen!
To make the Palak Paneer:
In a large skillet, melt some butter (ghee, if you have it) and add the cubes of paneer. Fry on all sides until just golden brown and remove from heat.
Next, add some more butter or ghee to the pan and sauté one white onion, finely diced, until tender.
Next, add your spinach. I suppose you could use frozen or canned whole leaf spinach, but if you've already gone to the trouble of making your own paneer, you might as well use fresh! I used two bags of baby spinach, and added one bag at a time to the pan. Spinach wilts very quickly, so I added one bag, removed the wilted spinach from the heat, and then added the second bag to make sure everything was cooked evenly.
When the spinach is all melted down, you'll add your spices. I used cumin, garam masala, and turmeric, about a teaspoon each, but use your judgement here. I really hate measuring spices, as it all depends on my mood how much I put in of each. I'm a big fan of tasting as you go, and add spices accordingly. Remember to add salt and pepper to taste as well. I also added one large diced tomato, mainly for color.
Here comes the sinful bit... add 1/2 cup Half and Half. Sure, you could use yogurt or even skim milk if you're watching calories, but the Half and Half really gives this dish its creamy texture.
Now add the fried paneer cubes back to the spinach mix and simmer on low heat for about ten minutes.
And you're done! Serve alone or over basmati or jasmine rice, as a side or as a main dish. This is creamed spinach to the max! If this is your first experience with Indian food, it's a great starter, and if you have grown up with Indian food, this is a great comfort dish. It may be time consuming, but it's well worth the effort. Make it with someone you love, and enjoy the bonding experience!
Apricot Curry Chicken
I saw this recipe at Cooking Light and it reminded me of a similar dish my mom used to make that was always one of my favorites. The best thing about this recipe is that it only calls for 4 ingredients! It's sweet and salty and absolutely delicious.
I made this using only ingredients out of my pantry, though I know some people might not have curry powder or apricot preserves on hand. A tip on curry powder: I bought mine at the grocery store for some ungodly price. While I thought it was worthwhile, as curry powder is one of my favorite spices, if you are thinking of buying some, check out your local ethnic foods market for a much better deal. I know for a fact that India Spice, at the corner of Valleydale Rd and Hwy 31 has this in stock, along with many other spice rack staples, at a fraction of the cost.
The ingredients:
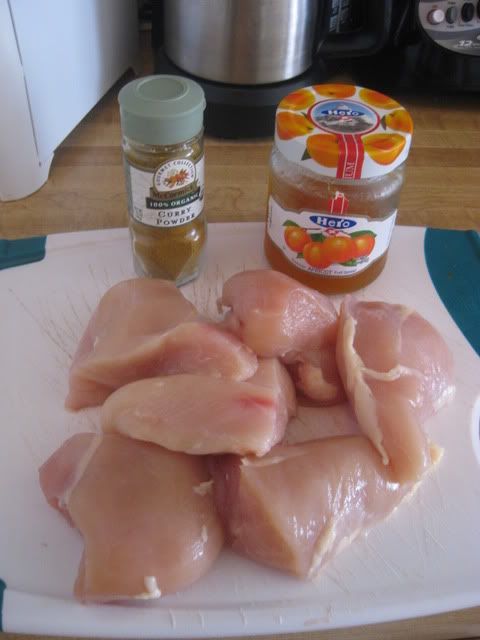
24 ounces chicken (I used chicken breasts, but I think thighs would be lovely in this dish as well!) cut into 6 4-oz pieces, 1/3 cup apricot preserves, 1 tsp curry powder, 1/2 tsp salt, 1/4 tsp freshly ground black pepper, 1/2 large red onion, sliced into strips.
Lovely spices!
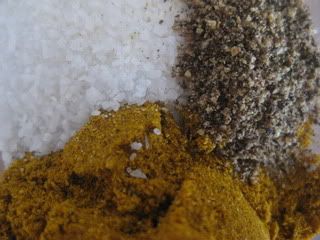
Mix the curry powder, salt, and pepper together and rub into the chicken pieces. In a large skillet, heat 1 tbsp butter or cooking spray over medium-high heat. You want the pan to be hot before you put the chicken in! Hot pan = delicious searing. Warm pan = gray meat. And nobody likes gray meat.
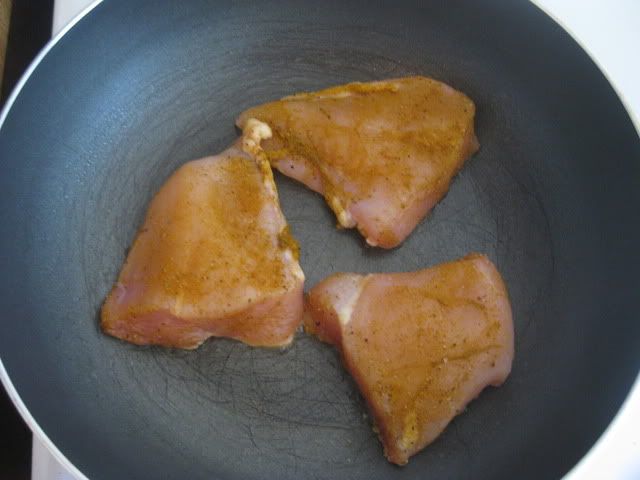
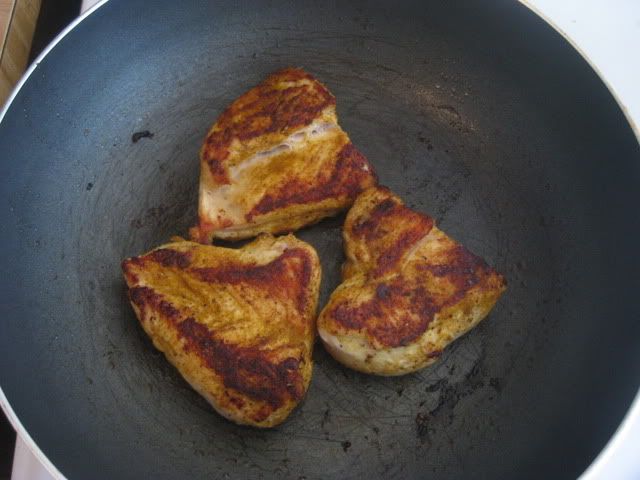
Fry the chicken 6 minutes on each side or until nearly cooked through. My chicken pieces were fairly thick, so it took a little longer than 6 minutes, and they weren't quite done in the center. No worries, though, we're not done with this bird yet! I did only 3 pieces at a time to avoid overcrowding the pan.
This is the sear you want to get... not burnt, only delicious flavor!
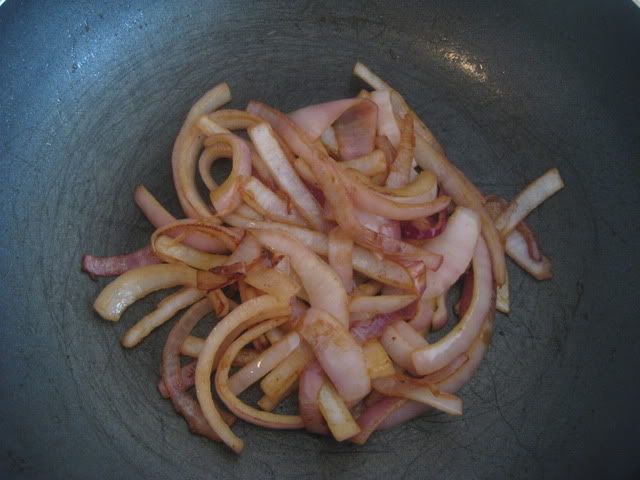
As an afterthought, I sliced up some red onion I had in the fridge. I think a nice vidalia onion would be even better, but this wasn't bad at all! Sauté the onion over medium heat until you can smell them. That's how I do most of my cooking, by the way... your sense of smell, touch, and taste are a much better gauge than any egg timer.
Now it's time for the apricot preserves! I could eat this by the spoonful...

Add the preserves plus 1/4 cup water to the onions and stir til well-blended.
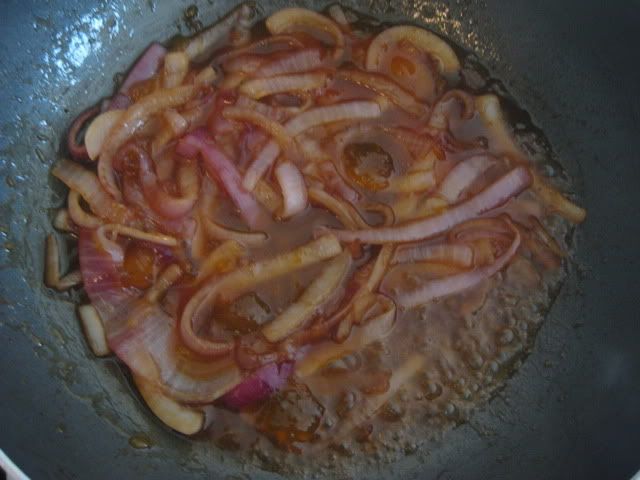
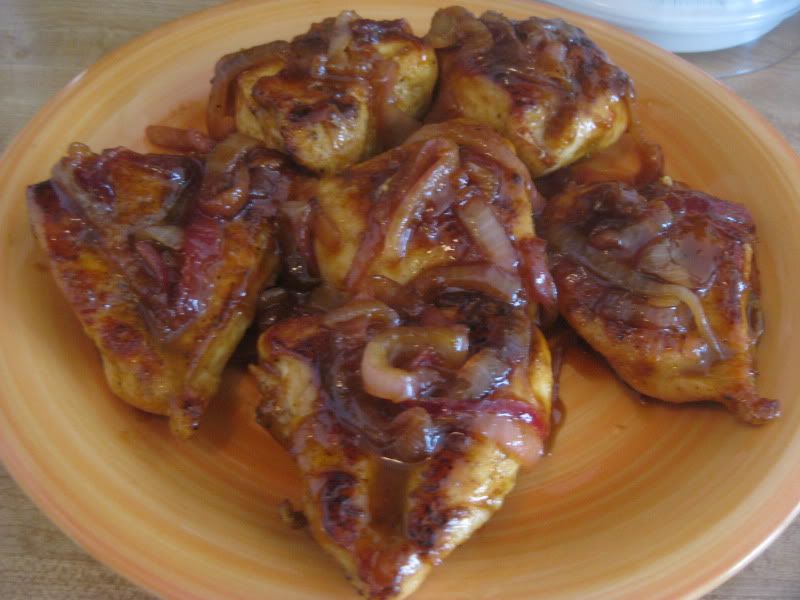
When the mixture comes to a slow boil and starts to thicken, add the chicken back into the skillet. Turn heat to medium-low and let simmer for about 10 minutes or until chicken pieces are cooked through. Every few minutes, get a spoon and ladle some of the onion/apricot mix over the top so everything stays nice and moist.
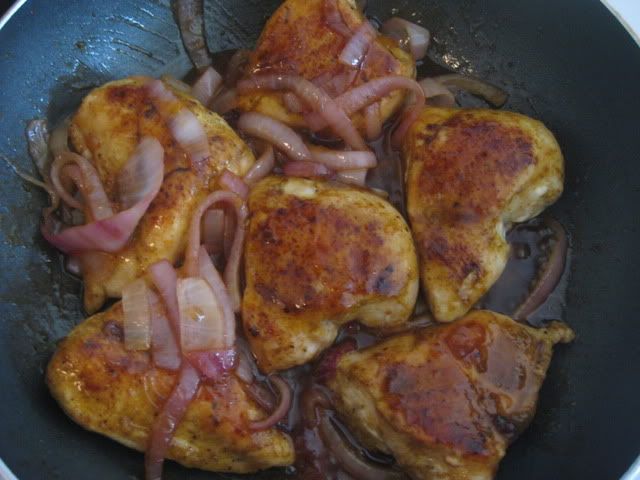
That's it! Serve over rice or with a nice salad. Actually, any kind of green veggie would be wonderful with this.
Recipe - Serves 6
I made this using only ingredients out of my pantry, though I know some people might not have curry powder or apricot preserves on hand. A tip on curry powder: I bought mine at the grocery store for some ungodly price. While I thought it was worthwhile, as curry powder is one of my favorite spices, if you are thinking of buying some, check out your local ethnic foods market for a much better deal. I know for a fact that India Spice, at the corner of Valleydale Rd and Hwy 31 has this in stock, along with many other spice rack staples, at a fraction of the cost.
The ingredients:
24 ounces chicken (I used chicken breasts, but I think thighs would be lovely in this dish as well!) cut into 6 4-oz pieces, 1/3 cup apricot preserves, 1 tsp curry powder, 1/2 tsp salt, 1/4 tsp freshly ground black pepper, 1/2 large red onion, sliced into strips.
Lovely spices!
Mix the curry powder, salt, and pepper together and rub into the chicken pieces. In a large skillet, heat 1 tbsp butter or cooking spray over medium-high heat. You want the pan to be hot before you put the chicken in! Hot pan = delicious searing. Warm pan = gray meat. And nobody likes gray meat.
Fry the chicken 6 minutes on each side or until nearly cooked through. My chicken pieces were fairly thick, so it took a little longer than 6 minutes, and they weren't quite done in the center. No worries, though, we're not done with this bird yet! I did only 3 pieces at a time to avoid overcrowding the pan.
This is the sear you want to get... not burnt, only delicious flavor!
As an afterthought, I sliced up some red onion I had in the fridge. I think a nice vidalia onion would be even better, but this wasn't bad at all! Sauté the onion over medium heat until you can smell them. That's how I do most of my cooking, by the way... your sense of smell, touch, and taste are a much better gauge than any egg timer.
Now it's time for the apricot preserves! I could eat this by the spoonful...
Add the preserves plus 1/4 cup water to the onions and stir til well-blended.
When the mixture comes to a slow boil and starts to thicken, add the chicken back into the skillet. Turn heat to medium-low and let simmer for about 10 minutes or until chicken pieces are cooked through. Every few minutes, get a spoon and ladle some of the onion/apricot mix over the top so everything stays nice and moist.
That's it! Serve over rice or with a nice salad. Actually, any kind of green veggie would be wonderful with this.
Recipe - Serves 6
- 24 oz chicken, cut into 6 4-oz pieces
- 1/2 red onion, sliced
- 1/3 cup apricot preserves
- 1 tsp curry powder
- 1/2 tsp salt
- 1/4 tsp freshly ground black pepper
- Blend spices and rub into chicken pieces
- Cook chicken in a skillet on medium-high heat for 6 minutes per side, remove from heat
- In same pan, sauté onions until tender
- Add apricot preserves and 1/4 cup water to pan, cook over medium heat until boiling
- Add chicken pieces back to pan, reduce heat to medium-low and cook, stirring often, for 10 minutes or until chicken is cooked through.
Subscribe to:
Posts (Atom)