Showing posts with label Comfort Food. Show all posts

Wednesday, October 20, 2010

Chicken and Roasted Broccoli Alfredo

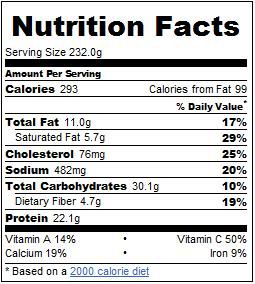
If you're the sort of person to see the word "alfredo" and click away immediately, before the mere thought of a cream-based sauce widens your hips, fear not!  Today, I have made the impossible possible!  What I have for you here is a rich, creamy, hearty, flavorful pasta casserole that will fill you up while actually trimming you down! Never again will you brave your grocer's freezer aisle in search of measly frozen dinners because you want pasta but can't afford the calories of a home-made dish!  Folks, this casserole clocks in at under 300 calories per serving, and the serving size is more than enough to fill you up.  Behold, the miracle secret-weight-loss pasta:


The best part is, I didn't use any "fake" low-calorie ingredients to make this.  No fat-free cheese, no reduced-calorie alfredo sauce, no low-carb pasta... everything is full-fat and boyfriend-friendly.  Let us begin!

To start, I seasoned some broccoli florets with my trusty no-salt seasoning blend, using non-stick cooking spray instead of oil to get the spice to adhere.  I popped the broc in an oven set to 400 degrees to roast while I got the rest of the ingredients ready.


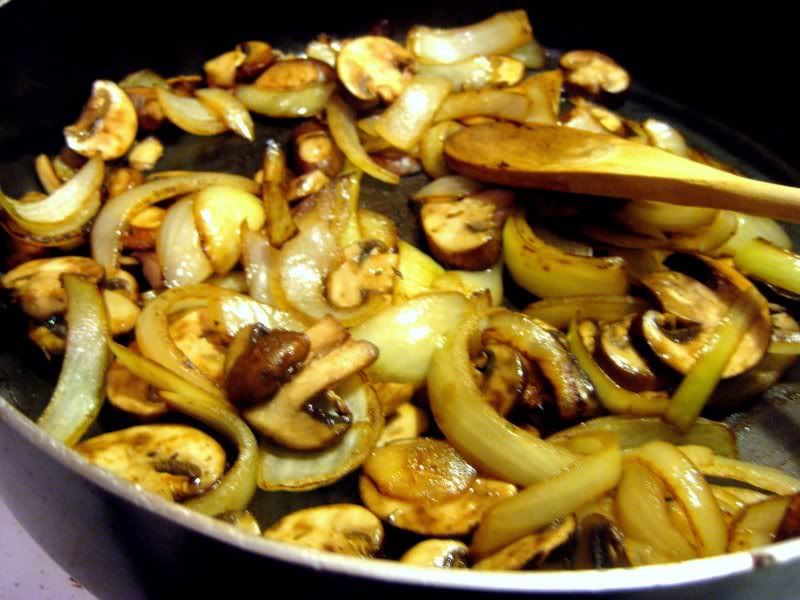
 In a large pot, I boiled half a box of Ronzelli Whole-Grain penne pasta until al dente.  In a large (large!) skillet, I cooked one yellow onion, cut into large chunks, with some more of the miracle non-stick spray.  When they were cooked til just tender, I added a whole container of pre-sliced, pre-washed baby portabello mushrooms.


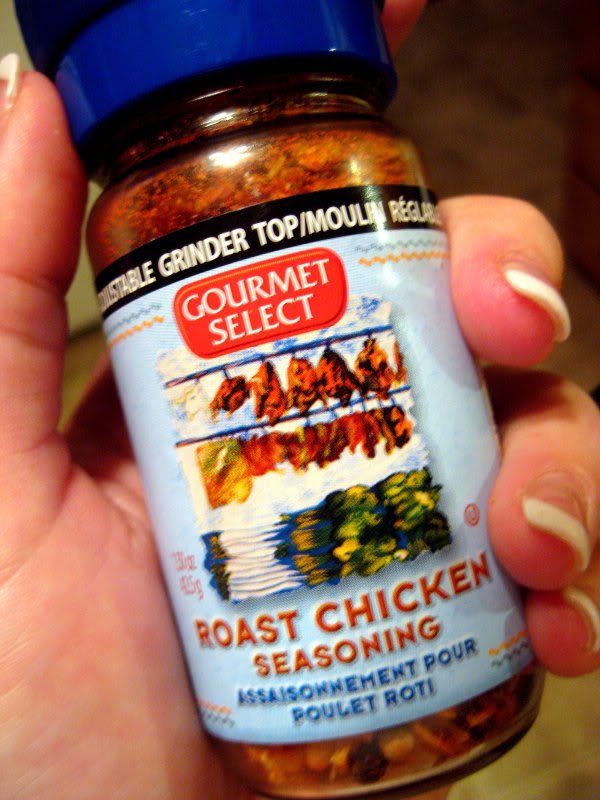
Once the mushrooms were tender, I added two cups of shredded chicken that I had left over from last night's dinner (rotisserie chicken works great, or any sort of pre-cooked chicken you may have on hand) along with a generous sprinkling of my favorite chicken seasoning.
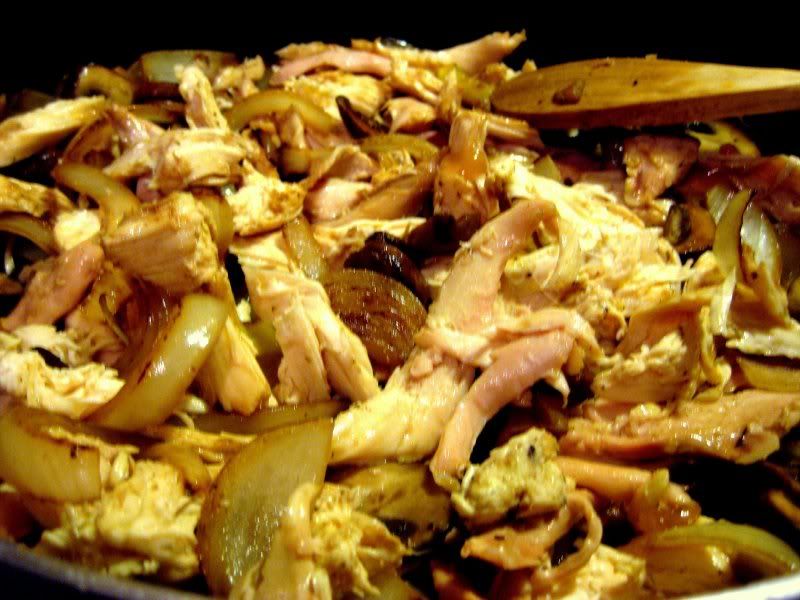


At this point, my broccoli was ready (fork-tender, but still packing a bite), so I added it to the pan, too.  When the chicken was warmed through, I added my alfredo sauce.  To tell the truth, I haven't cooked or eaten anything having to do with alfredo in years, simply because I'm scared of the calories.  But I saw this at the grocery store and was actually amazed at how "light" it was, despite not having any sort of "low-calorie" labeling.
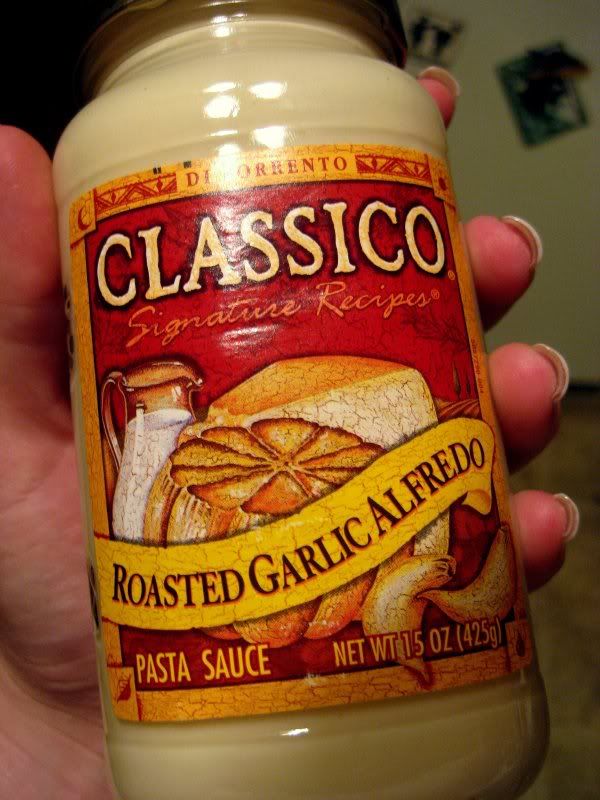
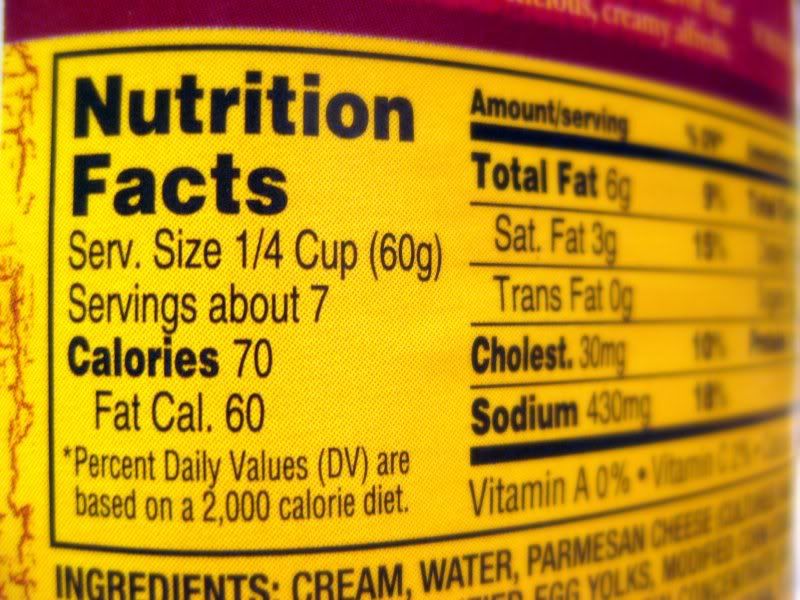


Once the sauce was warmed through, I realized I didn't have enough sauce for all the stuff I was cooking, and there was still quite a bit of sauce sticking to the sides of the jar.  I poured in about half a cup of milk (I used 2%), closed the lid, and shook the jar to thin out the remaining sauce and poured the whole thing into my skillet, stirring to combine.
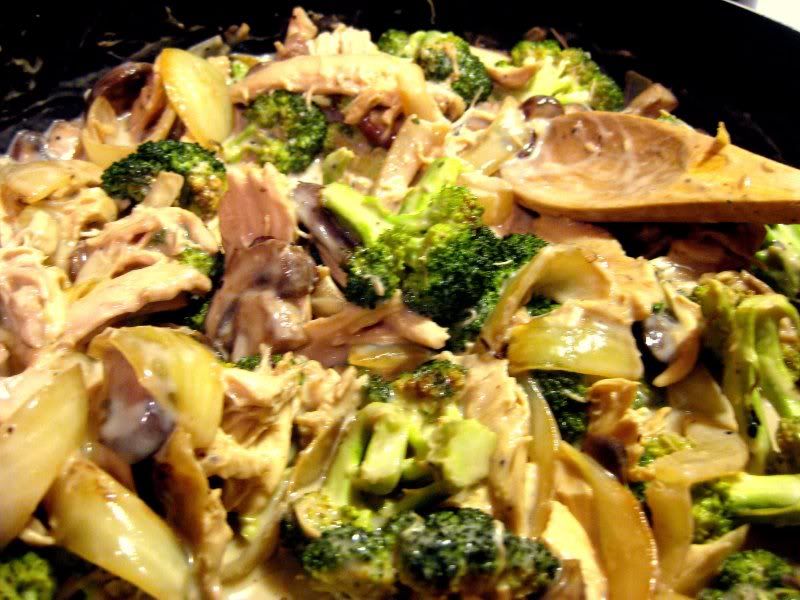


By this time, my pasta was done, so I drained and rinsed it, and mixed it with my other ingredients, and poured the whole shebang into a large casserole dish.
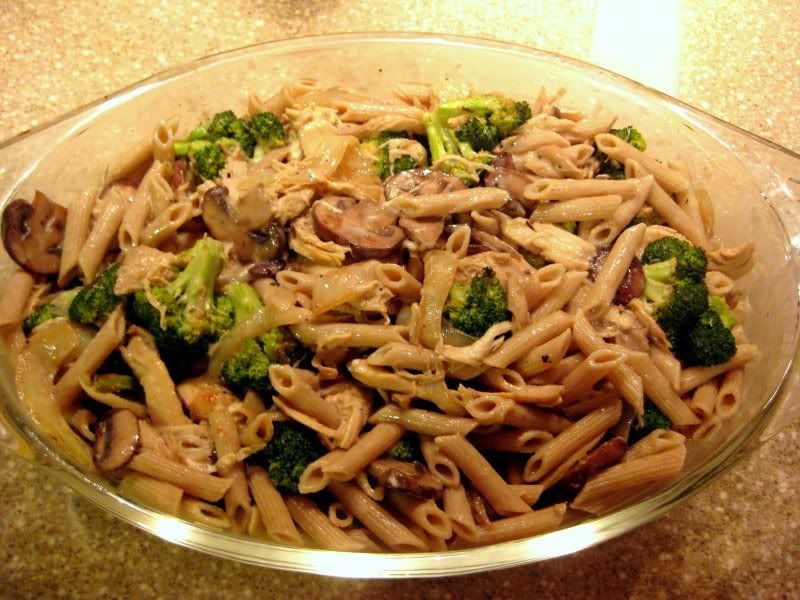


I topped the casserole with one cup of shredded mixed Italian cheese (mozzarella, parmesan, asiago, romano, and god-knows-what-else) and another heavy sprinkling of my no-salt seasoning.
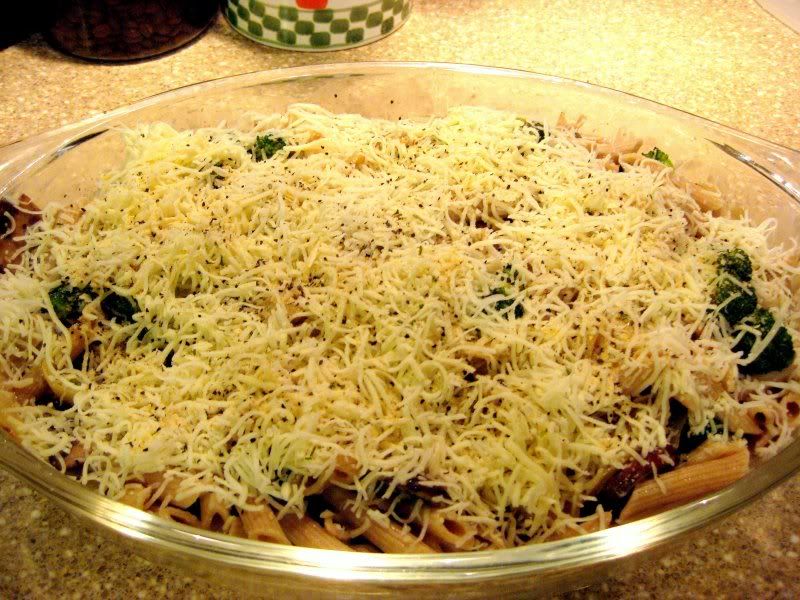


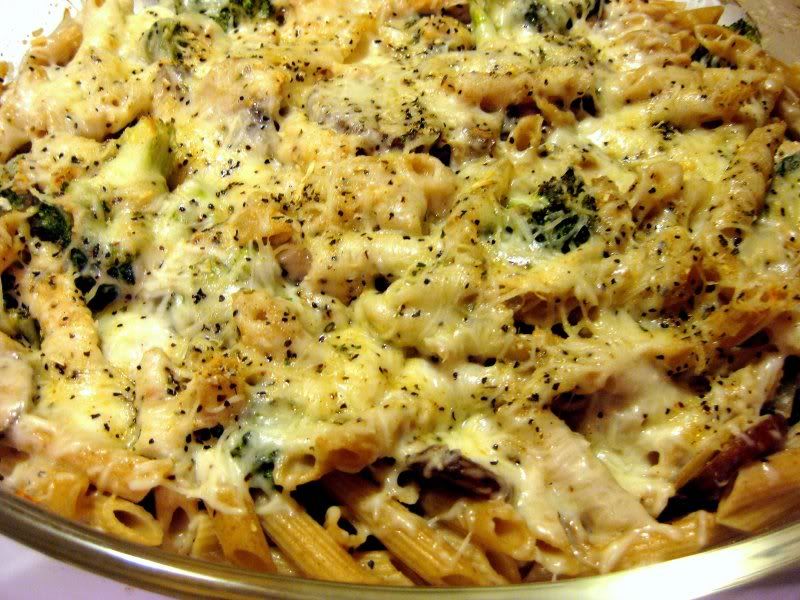
The oven was still set to 400 degrees, so I popped the dish in for about ten minutes, and it came out looking like this:
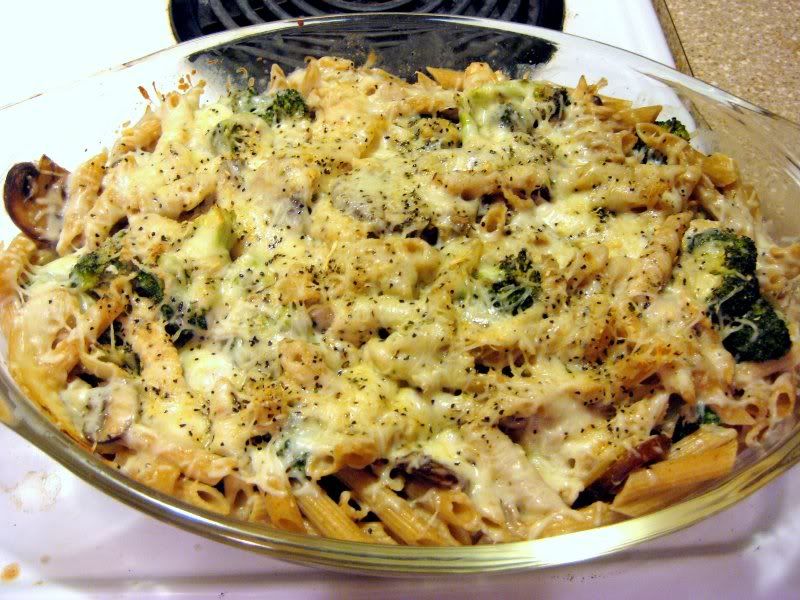


Amazing!  Truthfully, no one will ever know how healthy this is.  The whole wheat pasta was better than most I have tried, and in a blind taste test, you'd never know it wasn't the evil white stuff.  There wasn't very much sauce, but it honestly didn't need any more than it had.  The seasoning blend plus the cheese added more than enough flavor, and my favorite part was the roasted broccoli... really something amazing!
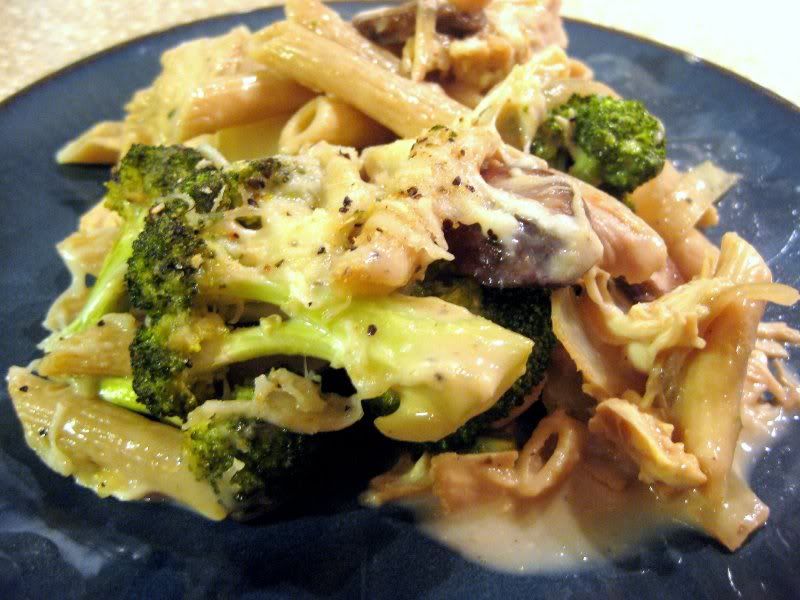


This makes seven servings, so it would be a great family dinner (just add a side salad and you're done), but if you're just cooking for two, like I am, it makes for great leftovers for the rest of the week.  Hope you enjoy it, folks... this may be my very favorite recipe here on Kelly's Noms, so give it a try and let me know what you think!
Tuesday, October 19, 2010

Waffle House at Home

Last night (maybe after a beer or two), Scott really wanted to go to Waffle House.  Being on a diet, I could not have been less pleased with this, as I have no restraint when it comes the ol' WH.  I get the same thing every time: a cheesesteak melt with hash browns covered and smothered.  NOT good for the hips, my friend.  We came to a compromise... we snacked on healthy munchies at home (pickles, string cheese, and celery) and I promised to make him a Waffle House breakfast in the morning.


It has been years since I have attempted to make hash browns from scratch, but I remembered them being fairly easy to pull off, if a bit difficult to perfect.  The trick is to squeeze as much water from the potatoes as possible (did you know potatoes were so full of water? It's amazing!).

I started with two smallish Russet potatoes and half a yellow onion.  I shredded the potatoes and onion using my box grater over a tea towel lined with three layers of paper towels and lightly salted them.  I wrapped them up and wrung them out over the sink (it's fun to watch the tea towel turn purple... don't use a good one!) until I couldn't squeeze out any more water, then I swapped out the paper towels with three layers of fresh ones and squeezed again.  Meanwhile, I heated up a large skillet with a half-and-half blend of olive oil and butter.  When the butter had begun to brown and was sizzling, I spread out my potatoes and onions into a single, 1/2-inch layer in the pan and added more salt and some freshly ground black pepper.  I packed them down with a spatula and left them alone... if you move them, they won't get brown!


After about 5 minutes, the hash browns were ready to flip.  I  covered the hash browns with a large dinner plate, and flipped the pan so the hash browns were inverted into the plate, then I added a little more oil and butter to the pan and slid the hash browns back in, to cook for another 5 minutes.

A little burned, but it's okay... more flavor!

Meanwhile, I scrambled up some eggs, toasted some bread, and shredded some sharp cheddar cheese.  When the eggs were nearly set, I turned off the heat and covered them with shredded cheese to melt while the toast was finishing.  By the time the toast was done, the cheese was melted and the hash browns were a nice golden brown on both sides, and ready to serve!

I added a little mayo to the toast (just a teeny smear will work wonders) and made open-face sandwiches with the scrambled eggs, and topped the hash browns with a little more shredded cheddar (smothered and covered, just like I like them!).

Cheddar makes it better!

The hash browns were very nice and crispy, and had great flavor, but they were a little greasy.  Next time I think I would use less oil in the pan, and let the pan get a little hotter before I add the potatoes.  The cooler the pan is, the more grease your food will absorb.  Overall, though, I am quite pleased with how they turned out, especially since I haven't made them in forever.  Total cook time, including prep, was about 15 minutes, so it's really not as time-consuming as one would imagine.  And Scott, who has always been very critical of my scrambled eggs, said these were absolutely perfect!  (The trick is to let the beaten eggs sit in the pan for a few seconds before starting to scramble them)

So the next time you are craving Waffle House, save yourself some money and calories and just make your breakfast at home!

Thursday, September 9, 2010

Beefcakes!

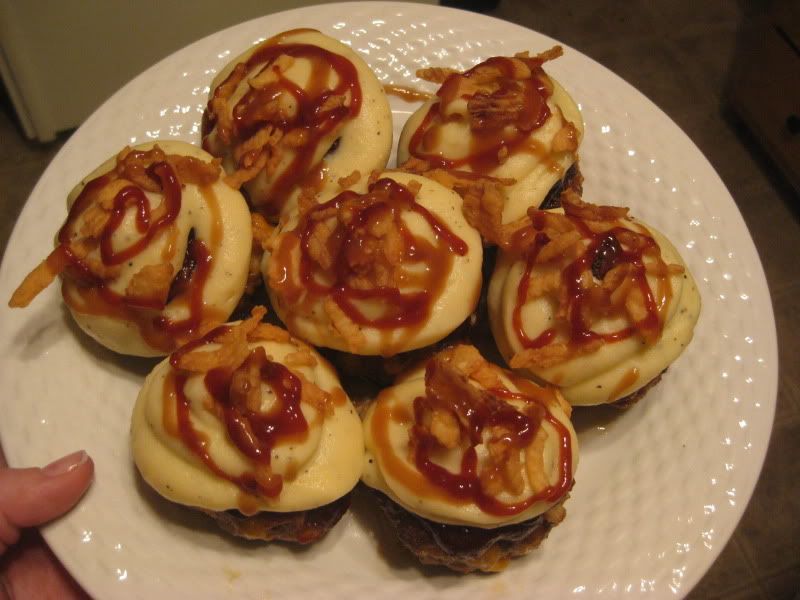
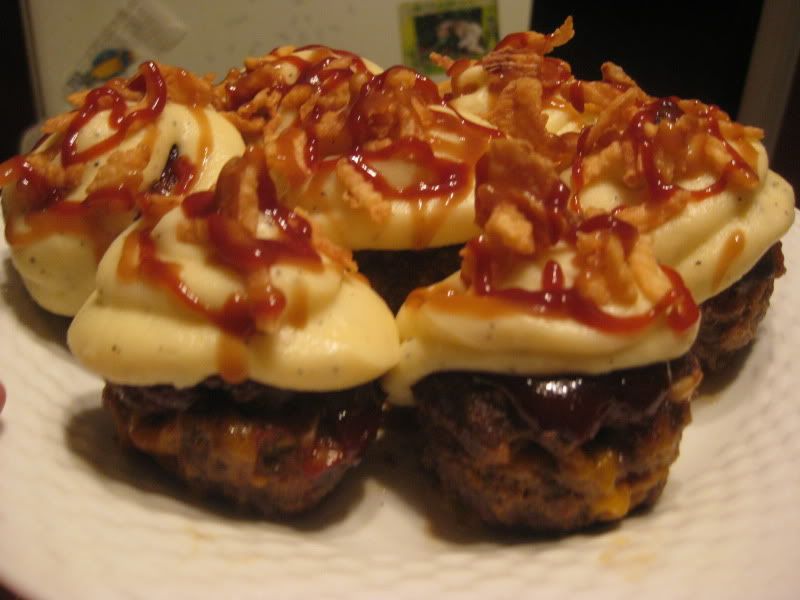
When is a cupcake not a cupcake?  When it's a beefcake!


Okay, there is a little backstory to this one.  Fun fact about Kelly:  I read a lot of food blogs.  A LOT.  I read them to drool over fatty sugary things I would never allow myself to eat, I read them to discover new flavors, I read them for inspiration for my own blog, and of course, I read them to find good recipes.  One of my favorite websites is tastespotting.com, where you simply scroll through gorgeous pictures of delicious food, and if you find something you like, clickety-click, there's the recipe!  The only problem I have with tastespotting is that there is an abundance of sweets and baked goods that I have no interest in.  I mean, sure, I like cake and cookies as much as the next guy, but I don't like them enough to actually make them.  The hottest trend right now, it seems, is cupcakes, and while some of them are very unique and very pretty, I simply can't picture myself whipping up a batch of cupcakes that will ultimately sit in the back of my fridge until they mold.  I was discussing this with my boyfriend (who, incidentally, asked for a meat cake for his birthday), and presto!  The beefcake was invented.

I definitely can't claim the beefcake as my original idea.  Sure, I thought of it on my own, but after doing some research, I found that I am by no means the first one to make them.  To be true to myself, though, I didn't read any recipes... I only looked at pictures for my inspiration, to make sure the recipe was all my own.

The concept is simple:  a meatloaf shaped like a cupcake and "frosted" with mashed potatoes.  They are cute, and they make portioning very easy, not to mention cutting down the cooking time.

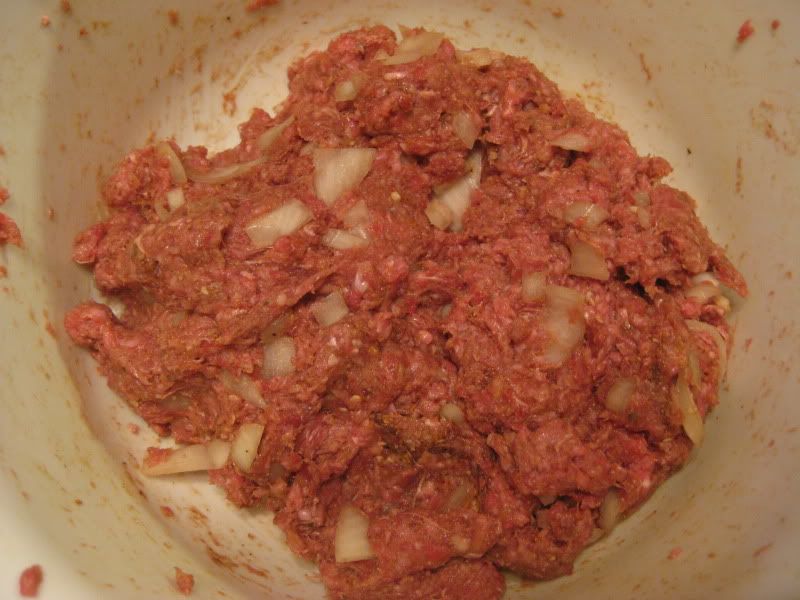
For my basic meatloaf, I mixed some ground beef with chopped onions, an egg, Dale's marinade (because I can't make ground beef without it), panko and Italian breadcrumbs, and my extra-special blend of meatloaf seasonings.  I can't give you an exact recipe for my spice blend, because there really isn't one.  I basically just reach into my spice cabinet and sprinkle a little of this and a little of that until I think it's right.  For this meatloaf, I used minced onions, garlic powder, chile powder, salt and pepper, and cocoa-chile blend.

Don't worry.  It may be ugly now, but the transformation is just beginning!

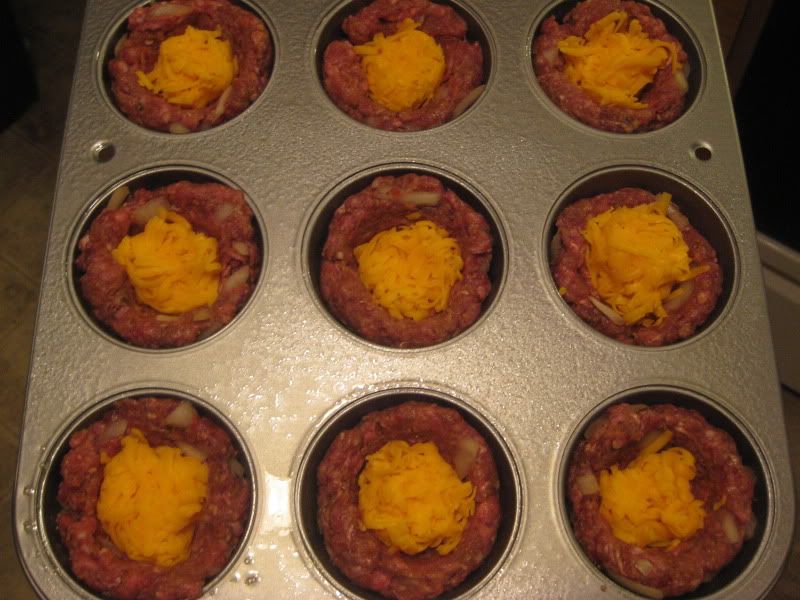
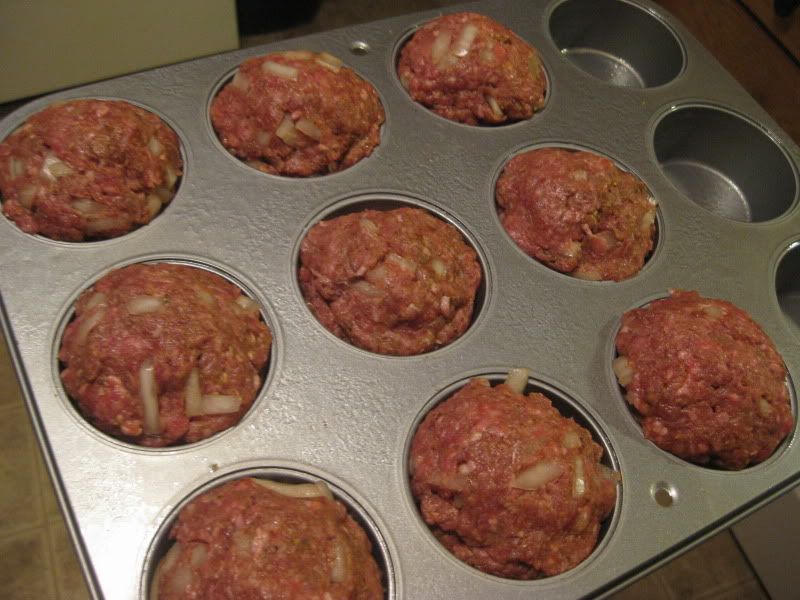
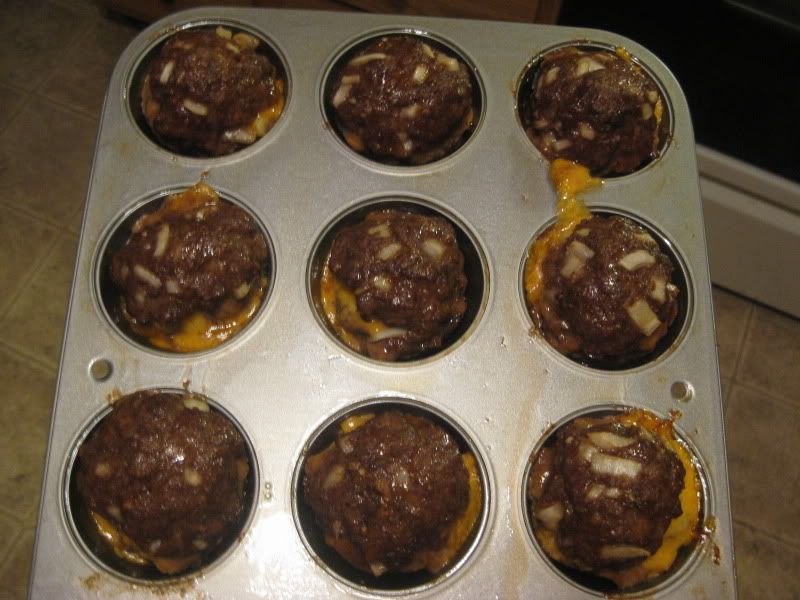
Once the meat was mixed well (by hand, of course), I rolled it into several small meatballs.  I pressed the meatballs into the cups of a muffin pan, forming the bottom and the sides of the "cupcake", leaving a well in the middle for my secret ingredient: cheese!  I shredded some cheddar cheese and pressed a little bit into each well, then topped each "cupcake" with another meatball, pressing along the sides to seal the cheese in the middle.


A word about forming your beefcakes: They will not rise the way cupcakes do in the oven, and in fact will shrink when cooked, so make sure to form a nice mound on top, and make them look the way fully cooked cupcakes do.

I popped the beefcakes in the oven at 350 degrees and started on my mashed potatoes.  Time was of the essence, so I peeled and quartered about 5 potatoes and threw them into some salted water to boil.  Cutting the potatoes up drastically reduces the time they need to cook, and they were fork-tender in about 15 minutes.  I drained them and let them cool for just a minute while I prepared my beefcake glaze.


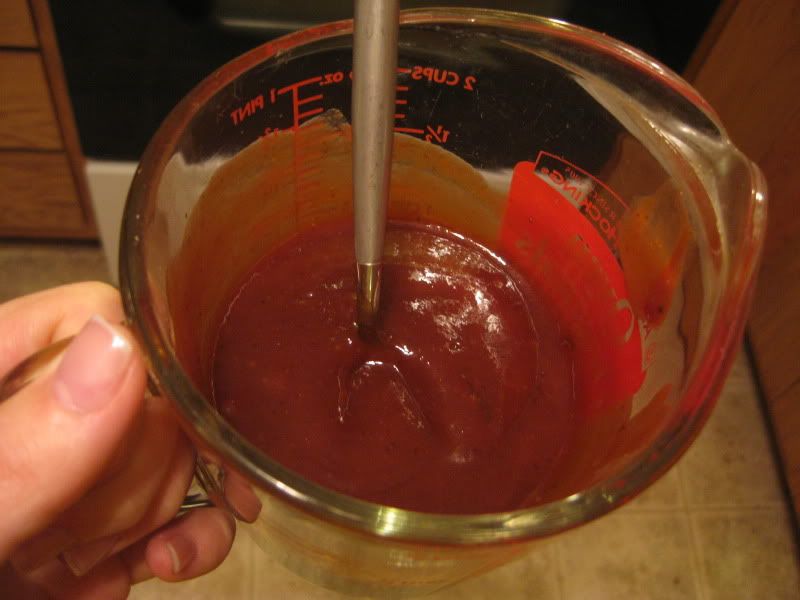
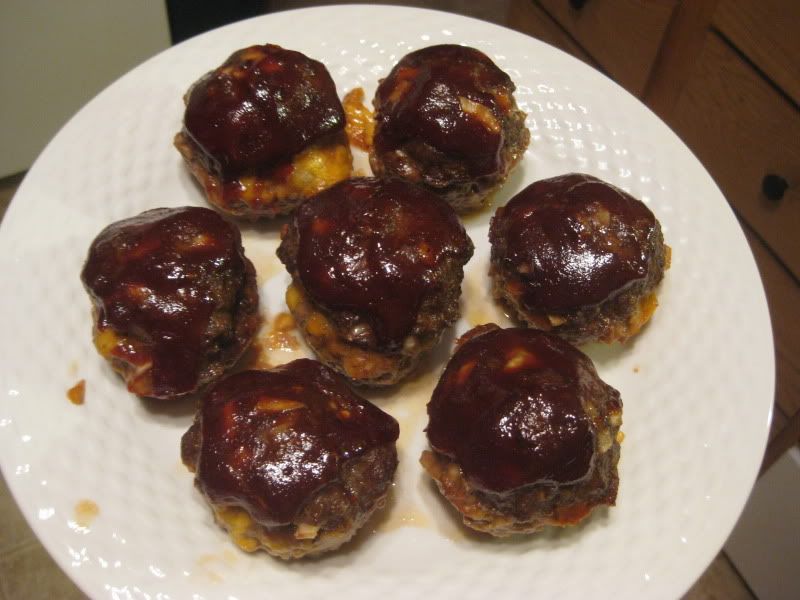
For the glaze, I mixed some ketchup with some more Dale's, some Sriracha, some honey barbecue sauce, and some brown sugar.  The end result tasted like a thick, sweet and spicy barbecue sauce, and actually would have been delicious on some ribs, but that's another post...  I took the beefcakes out of the oven and drained them (a LOT of fat pools up in those muffin cups!), then spooned on a generous portion of glaze and popped them back in the oven while I made my mashed potatoes.

Cheesy, fatty, oozy goodness, pre-glaze

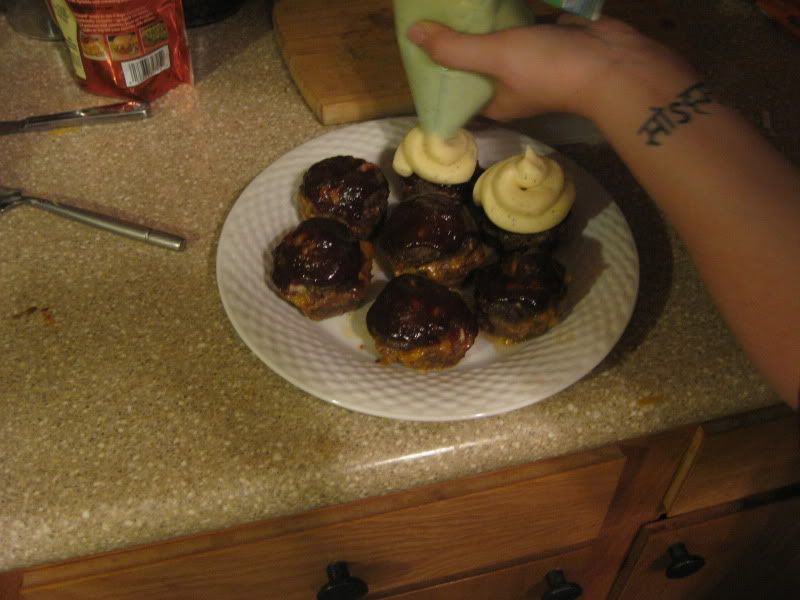
I wanted the potatoes to be super creamy, so I put them in the food processor with some milk, butter, sour cream, salt, and pepper (Paula Deen would be proud) and blended until they were smooth, then I added some more shredded cheddar and blended again until everything was nice and creamy.  I made a little brown gravy from a store-bought mix (shame!) and put the gravy and the remaining glaze in two separate squeeze bottles, for decorating my beefcakes.

Waiting for them to cool is the hardest part
By this time, the beefcakes were done, so I took them out of the oven and let them cool for about ten minutes (though I probably should have waited a little longer).  I scooped the mashed potatoes into a ziplock bag and snipped off one corner to make a piping bag, then "frosted" the beefcakes and topped with fried onions, glaze, and gravy.


Okay, so they didn't look as pretty as I had hoped... but man, were they delicious!  The meatloaf was moist and had a great flavor, the cheese was oozy and gooey, the potatoes were creamy and cheesy, and the onions provided a nice crispiness.  Scott and I are definitely planning to make this again soon, and experiment a little with the presentation aspect so they look more like cupcakes.  Try them at home, and let me know how they turn out!


Thursday, July 29, 2010

Fake Enchiladas!

They're not really fake.  But I'm not proud of how I made them.  Don't worry, though, they turned out to literally be the best enchiladas I've ever eaten in my entire life.  And I never, ever, ever use hyperbole to stress a point.  Ever.


Okay, so to justify my use of the word "fake": enchiladas are a beautiful thing.  The sauce should be made lovingly and the meat and vegetables should be prepared in such a way as to make them tender, juicy, and flavorful.  You should always use fresh ingredients, and avoid canned and pre-packaged foods at all cost.  But sometimes you are pressed for time and you're broke and you're hungry, so you make enchiladas the way I did today.  And you love every minute of it.

Ingredients:
1 large chicken breast, chopped into 1" cubes ($1.00 if you cut it yourself)
1/4 each of a large red, green, and yellow bell pepper, sliced into strips (I got a pre-sliced mix for $3.11)
1/2 yellow onion, sliced (already had it at home)
1/2 tub of onion and chive cream cheese ($0.45 on sale)
1 small can salsa verde ($1.25)
1/2 jar Mrs Rendfro's Black Bean Salsa, or salsa of your choice ($1.85)
generous handful or two of shredded "taco cheese" ($0.75 on sale)
beer (the equivalent amount to what you'd typically pour out for your homies) (price is negligible)
1/2 can chipotle peppers in adobo (already had it at home, but typically about $0.50)
4-5 flour tortillas, soft taco size ($1.30)

Total Cost: $10.21  Cost per serving: $2.55!!!

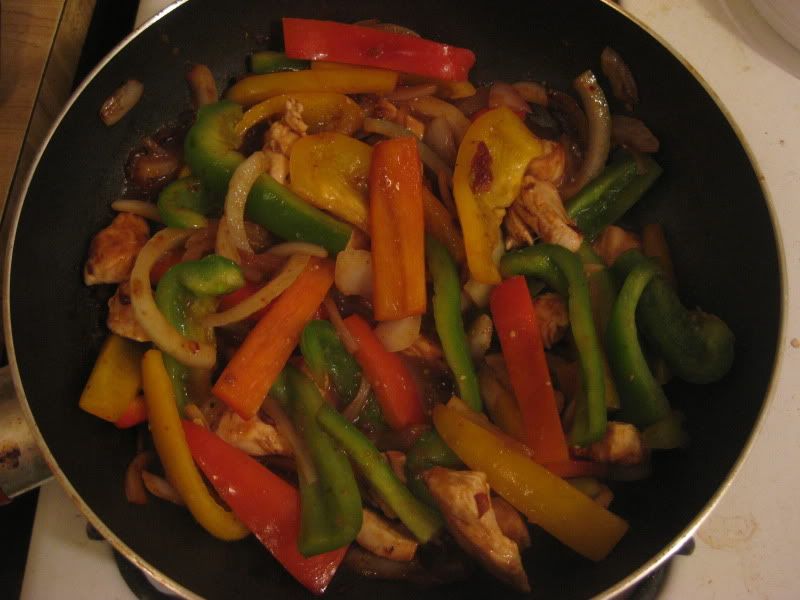
Okay, first things first.  I knew I wanted rice and beans to go with this, so I went ahead and started a pot of brown rice, seasoned with chili powder, salt, pepper, and dried red chilies.  Next, I butchered up my chicken (I bought a pack of split breasts for less than $4, cut one up and put the rest in the freezer for later) and added it to a large skillet with some butter (oil would have been better but I was out) and onions.  When the chicken was seared but not yet cooked through, I added the peppers and the chipotles.

Chicken and peppers and onions, Oh My!

A note on the chipotles, if you haven't used them before:  Always keep these in your pantry.  I use them for everything, and they are so delicious that you have to get in the habit of using them if you don't already.  They come packed in a thick red sauce (adobo) with onions, and you have to fish them out, slice them open, and scrape out the seeds and membranes with a spoon or the back of a knife if you don't want to die from hot-mouth.  If you don't necessarily want to use the peppers in your cooking, you can just spoon a little of the sauce into your dish for an instant punch of flavor (try mixing the adobo with some chopped garlic and mayo for a spicy aioli to spread on sandwiches).

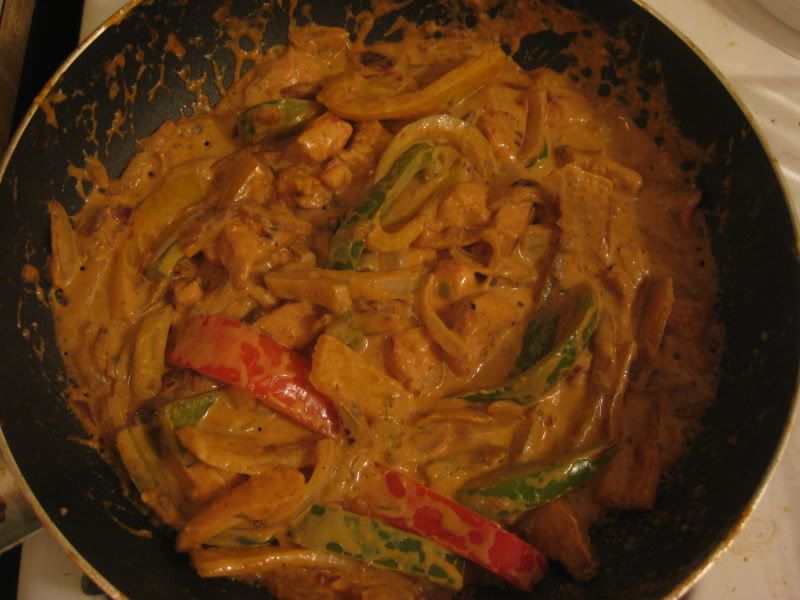
When the pan started to get a little dry, I added some of the salsa, a splash of beer, the rest of the adobo sauce from my can of chipotles, and the cream cheese.  I'd never made enchiladas with cream cheese, but several recipes I've seen call for sour cream, which I hate, so when I saw my favorite flavor of cream cheese on sale, I decided it would made a lovely substitute.  And man, do NOT miss out on this ingredient, because this literally elevated the dish to a level I never could have imagined without it.  The cream cheese makes the dish.  The chipotles are almost as essential, for the spice and smoky flavor they contribute, but the cream cheese is king here.  Trust me on this.

There is no way you could ever understand how delicious this is.  Unless you make it.

Okay, once I had all my stuff simmering away, I got my casserole dish ready.  This would have been way better (and would have fed more people) in a 9x13 dish, but all I had was a little 8x11 (or thereabouts), and it worked out just fine.  Pour the entire can of salsa verde over the bottom of the pan (you can Pam the sides of the dish at this point if you are so inclined, but hunger made me forget) and get your tortillas ready.  If the tortillas are rather flexible, you can use them as-is, but if they are a bit stale or too cold, they might tear, so you should nuke them for a few seconds to warm them up.

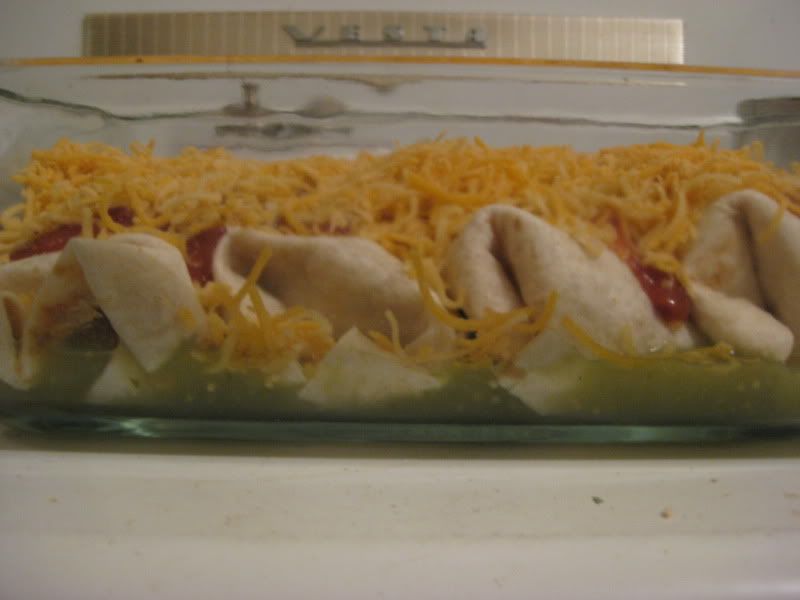
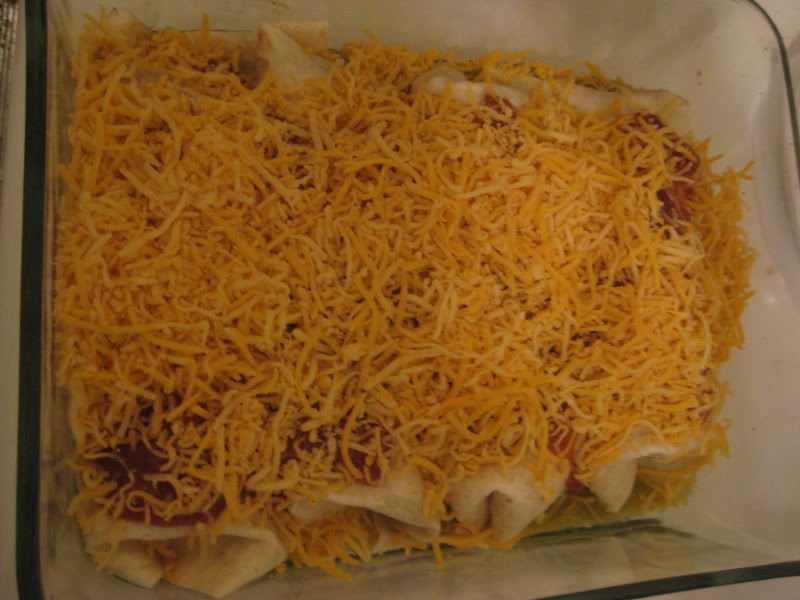
By this point, all the good stuff in the skillet was sizzling in a creamy and thick sauce.  If your sauce is too thick or too dry, add another splash of beer.  If it's pretty soupy, let it cook a bit longer.  When it's ready, spoon about a spatula-full of stuff in the center of a tortilla.  Roll it up burrito-style, then place it seam down in your casserole dish.  Repeat until you can't fit any more enchiladas in the pan.  Top with a generous serving of salsa (I do not believe in store-bought enchilada sauce.  Even if you're being lazy and can't make a sauce, use salsa or Rotel and you'll be just fine.  Enchilada sauce is poison.) and top the whole shebang with enough cheese to clog your arteries at the mere sight of it.  Or a healthier portion, whatever.  I opted for the artery-clog.

Don't let anyone fool you: pre-shredded cheese is the devil, but if you don't own a cheese shredder, it's a necessary evil on Enchilada Night.

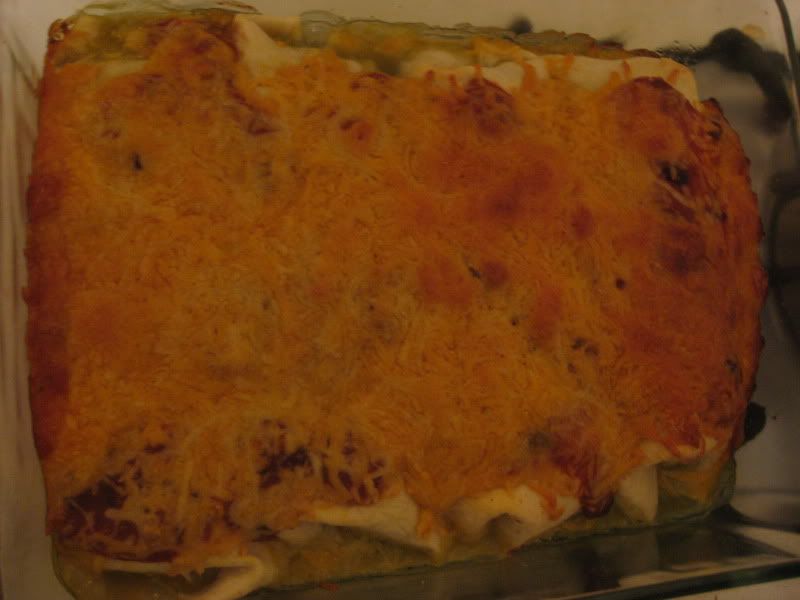
That's it, folks!  Pop that baby in the oven at about 350 degrees for as long as it takes for the cheese to bubble and the edges of the tortillas to crisp and brown.  Don't set a timer, just keep an eye on it. You'll know when it's done.


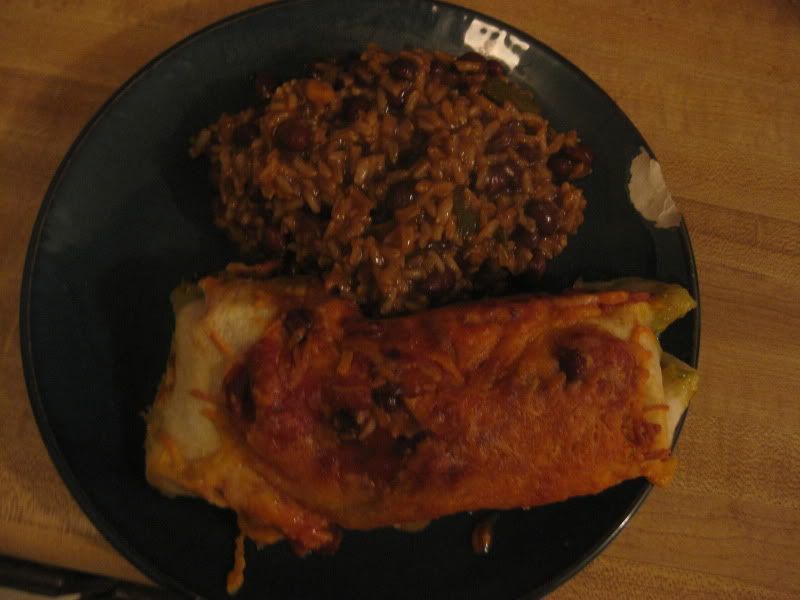
For the rice: when it was done, I pulled out the red chilies and added half a can of Bush's Grillin' Beans, black bean fiesta variety.  Huge mistake.  That shit is nasty.  But I ate it anyway, and I have lots of leftovers!

Poor lighting and a chipped plate help to drive home the idea that this is a poor-man's supper.  I was just too dang hungry and intoxicated by the aroma to wait long enough to take a proper photo.

Monday, May 24, 2010

Orange Thyme Roasted Chicken

So, my boyfriend and I were thinking of what to make for dinner tonight, and as usual, I started scanning the weekly supermarket ads to see what was on sale.  I noticed that whole chickens were buy-one-get-one, and I remembered that I had never made a whole roasted chicken before, despite that being one of my favorite childhood dinners, and instantly resolved to roast a chicken for dinner.


As a child, my mother would make amazing whole-roasted chickens surrounded by potatoes and carrots, essentially a whole meal in one pan.  I decided I would kick it up a notch.  After searching far and wide on the world wide web, I integrated several recipes to come up with something I thought would be easy, inexpensive, and delicious: Roasted chicken with a compound butter of orange and thyme.  The result: the richest flavored, most succulent chicken I've ever had in my life.  Seriously, folks, the chicken barely made it to the dinner plate, because my boyfriend couldn't keep out of it while he was carving it up for us (and I may have had a few bites myself).

The recipe is ridiculously simple, and equally as inexpensive.  I think the entire cost for the meal was hovering around $10 including a side dish, and that includes a potted thyme plant because my grocery store didn't carry any fresh herbs.

Ingredients:
1 whole roasting chicken (mine was a little less than 5 lbs)
1 orange
1/2 stick of butter
fresh herbs (I used about 5 sprigs of fresh thyme, but you can use whatever you have on hand)
1 sweet potato
1 large red potato
1 vidalia onion
salt and pepper
olive oil

First you'll want to make your compound butter.  Mix the half stick of butter with the zest of one orange and your fresh herbs, finely chopped.  If the butter is at or just below room temperature, this will be easy, but please don't microwave your butter to get it to the right temp.  You want the compound to be firm and not runny.

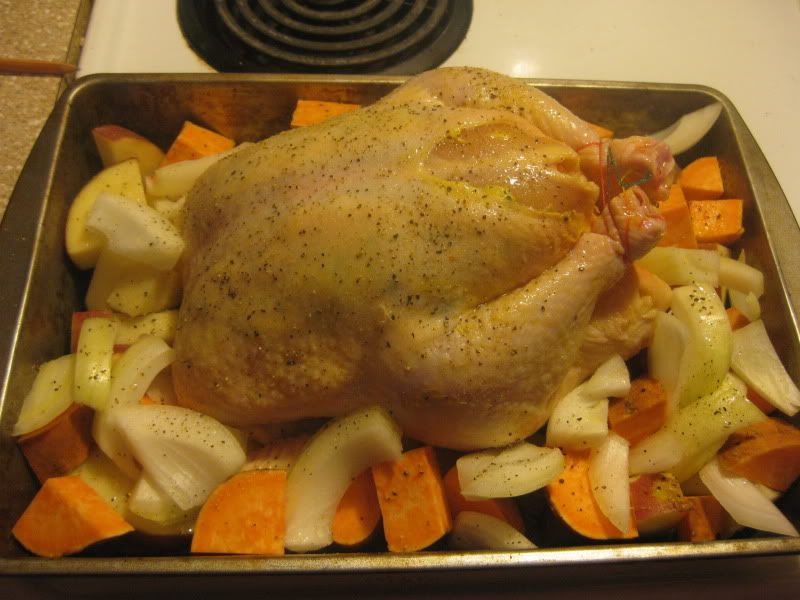
Once your compound is mixed, or while you're waiting for your butter to soften, prepare the chicken.  Rinse the chicken and discard the gross innards.  Bend the wings behind the bird so you have a nice base to work on and no wing tips sticking out - they will burn.  Now, with the breast facing up, work your fingers under the breast skin, separating the skin from the meat on each side from the leg end to the neck.  You will end up with two pockets, on each side of the breast bone.  You can use a spoon to separate the skin closer to the neck end if your fingers won't reach, but be careful not to puncture the skin.  Spoon one half of your compound butter under the skin on each side.  In this way, you will flavor the meat of the chicken instead of just the skin, and you will end up with incredibly moist white meat with an amazing flavor.  Massage the breast skin until the butter is evenly distributed under the skin.
\
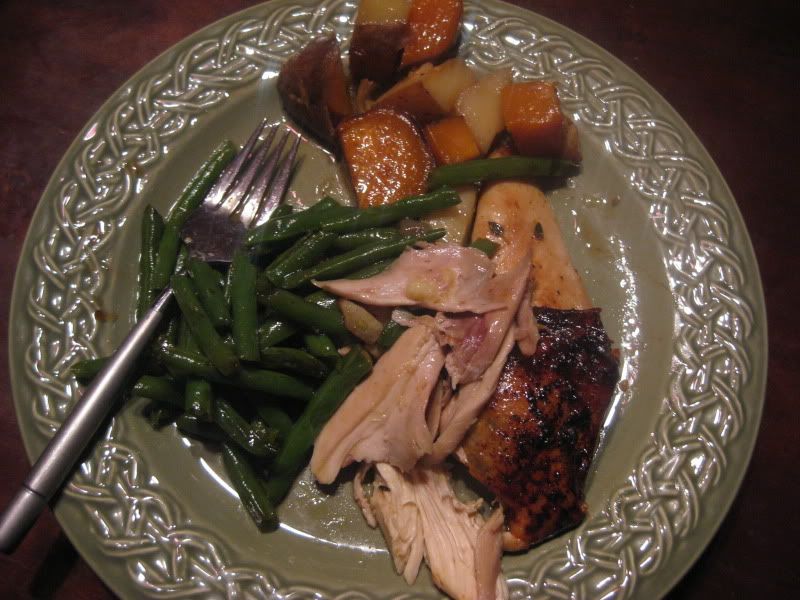
Stuff the cavity of the chicken with the orange, halved, and the stems from the thyme that you used for the butter.  Truss the legs together to close the cavity, and place the chicken in a roasting pan.  Surround the chicken with the sweet potato, red potato, and onion, roughly chopped, and drizzle olive oil over the whole shebang.  Rub the oil into the chicken skin and sprinkle liberally with salt and pepper.  Pop in the oven at 350 degrees and cook for 20 minutes per pound... about 1 hour and 40 minutes for a 5 pound bird.


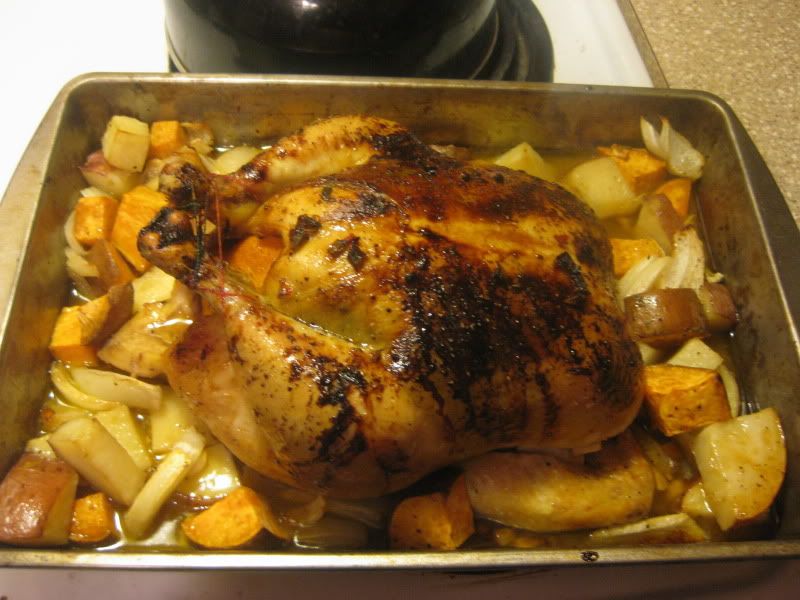
About 20 minutes before it's done, take the pan out of the oven and baste with pan drippings.  At this point, I made a glaze of orange juice, soy sauce, and honey, equal parts of each, and basted the chicken.  I increased the heat to 450 degrees and returned to the oven until the chicken was a dark golden brown.


That's it!  I can not emphasize enough how moist and flavorful this chicken was.  The skin was crispy and sweet, and the meat was moist and had a very distinct orange flavor.  The meal should serve at least four, but between my boyfriend and I, we took care of most of the bird and all of the vegetables.  There was enough meat leftover for sandwiches tomorrow, but just barely.  Once you make this, I promise, you will never roast chicken another way for as long as you live.

Thursday, April 15, 2010

Italian Eggplant Bake

I call it eggplant parmesan, but after viewing more than a few eggplant parmesan recipes online for comparison, I realize that this dish is not eggplant parmesan.  Even calling it "Italian" is a bit of a stretch, but it's the most apt title without getting overly descriptive.  "Eggplants, Cheese, and Sauce Baked in a Casserole" doesn't exactly roll off the tongue, but that's as accurate as I'll get.


To start, I must address the fact that some people do not like eggplant.  In fact, I'm realizing more and more that some of my favorite foods lie on the fringe of what most people call "good eats".  The simple fact of the matter, though, is that eggplant is good for you.  It's loaded with fiber, has very few calories, and is hearty enough to substitute meat in many dishes, if that's your thing.  So if you'd like to give eggplant a try, this is definitely a good starter dish.  It's easy, and the flavors of the cheese and sauce pretty much cover up whatever flavors you might find disagreeable.

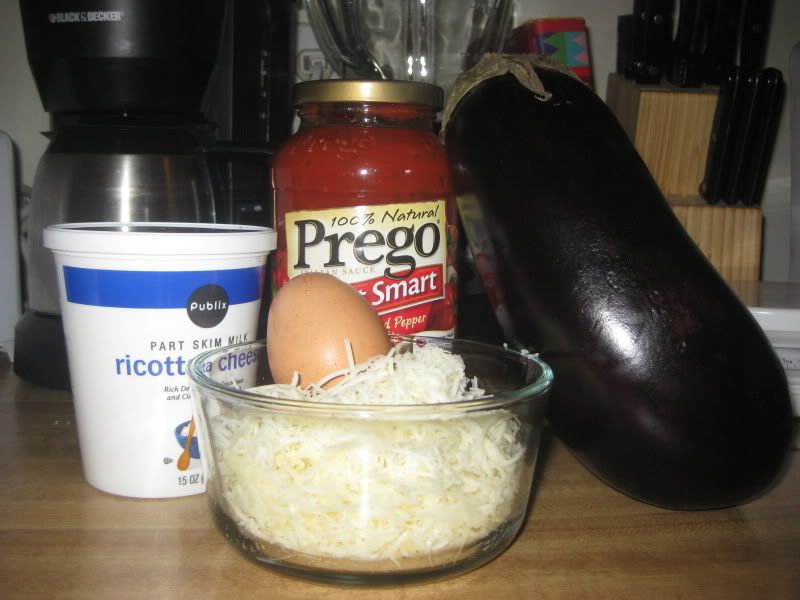
We'll start with the ingredients:


An eggplant (duh!), a jar of your favorite tomato-based pasta sauce (you won't use the whole thing), ricotta cheese (about 1/4 cup, but be warned I didn't measure a single thing for this entire recipe), 1 egg, and about 13/4 cup shredded Italian blend cheese.

Now for those of you who have never dealt with this strange purple fruit (vegetable?), here's how you go about tackling it:


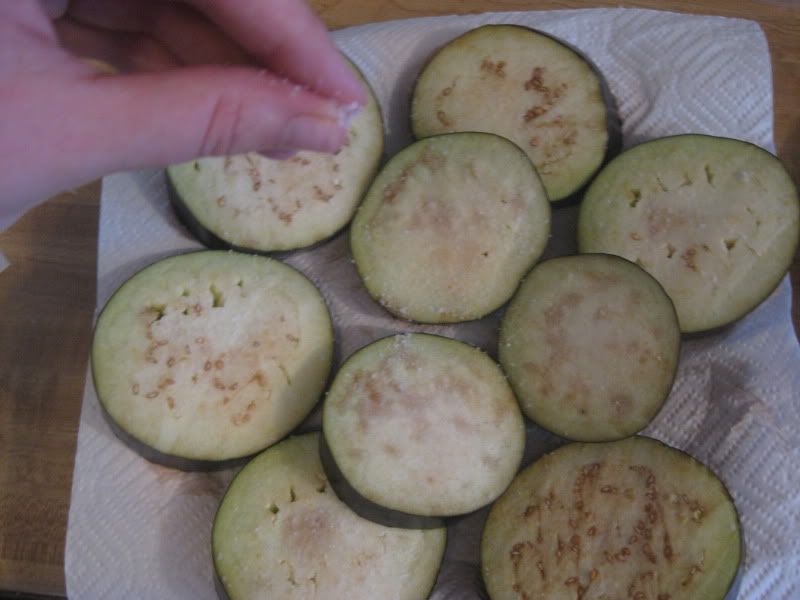
Slice off the very top and the very bottom, then cut the rest of it into 1/2-inch thick slices.  See all those little brown seeds?  They stay.  You won't mind them.  Lay the slices out on a sheet or two of paper towels (or a clean dishcloth, if you're more environmentally friendly than me) and sprinkle liberally with salt.  Go to town with the salt!  The salt draws out a lot of the moisture from the eggplant and with it, the bitter flavor.  Salting it makes it much more mild.  Don't worry, you'll rinse it all off later.

Salt both sides of each slice, then top with another paper towel (or dishcloth) and another plate, or anything to add weight.  You'll want to lightly press the eggplant for about 30 minutes, then rinse the salt from the slices.  Arrange the eggplant on a cookie sheet or roasting pan and bake in a 350 degree oven for about 10-15 minutes, or until tender.

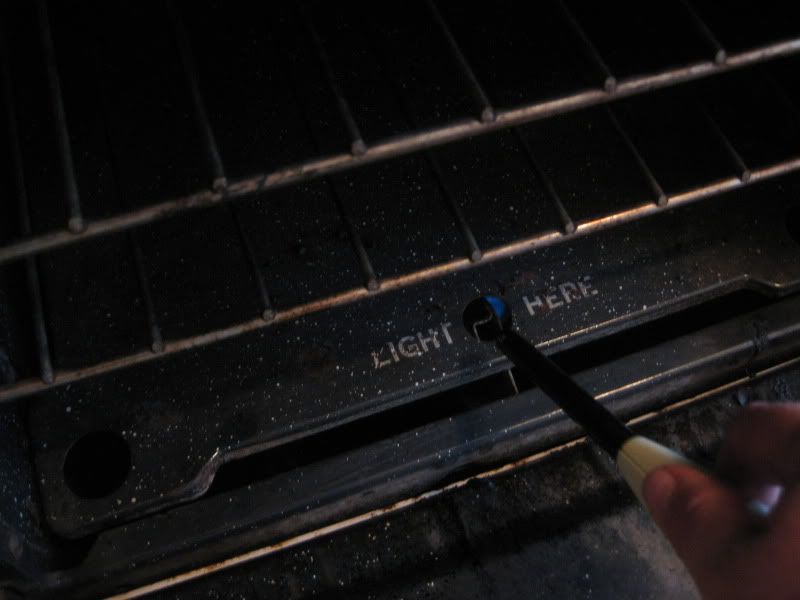
For those of you interested in my infamous eyebrow-exploding oven, here's how I preheat the thing:


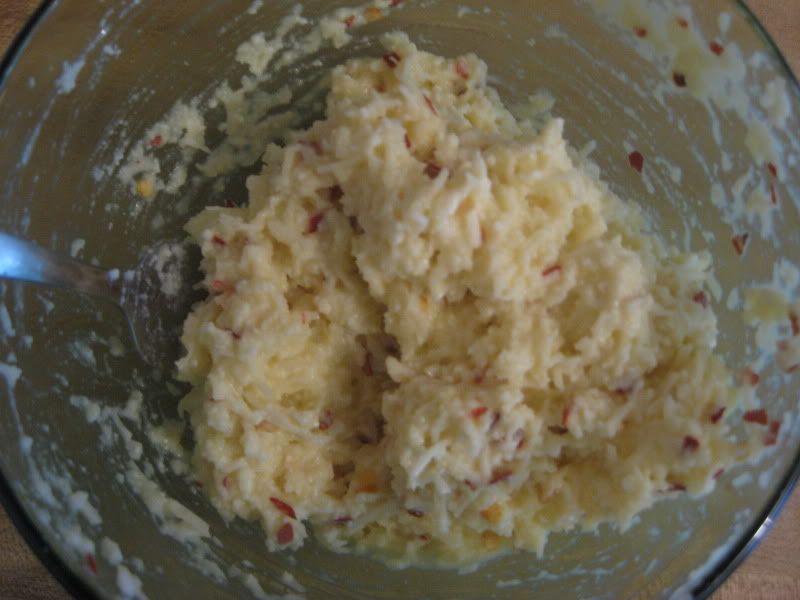
While your eggplant is roasting, you can prepare the rest of the ingredients.  Spoon a thin layer of sauce into a casserole dish.  I used a 9x11, but just use whatever size you have.  I only have one casserole dish, poor me! Then, beat your egg (I scooped out half of the yolk, because I'm idiotically trying to save calories in a dish that will shortly be covered and dripping with cheese) and add the 1/4 cup ricotta and 3/4 cup Italian blend cheese.  I also added some crushed red pepper flakes because I'm spicy.

Gross.


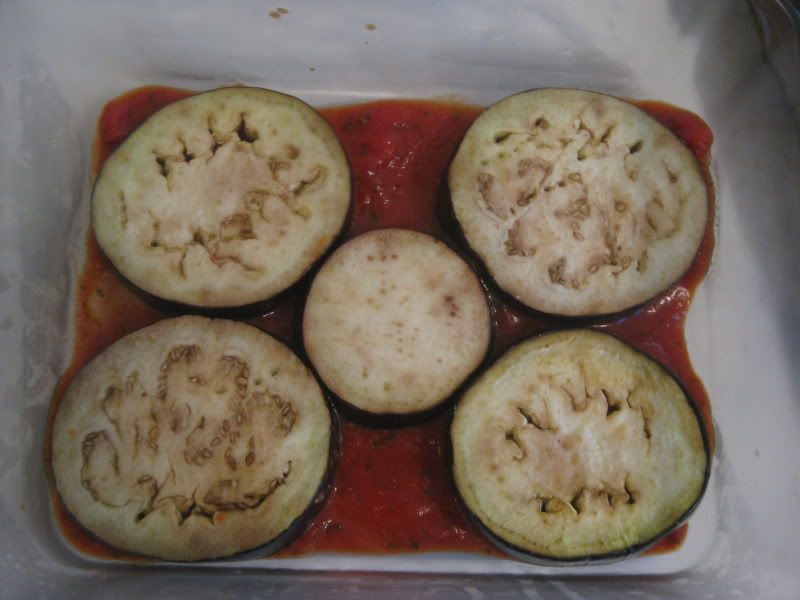
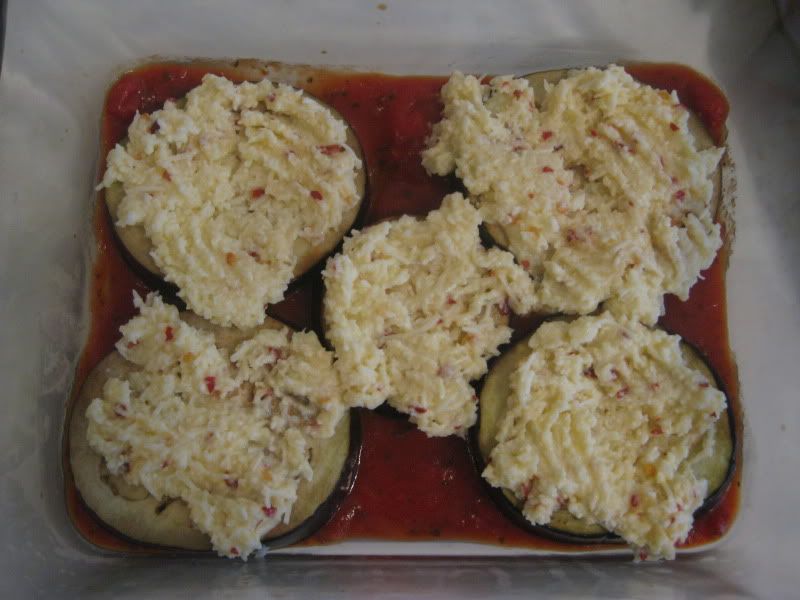
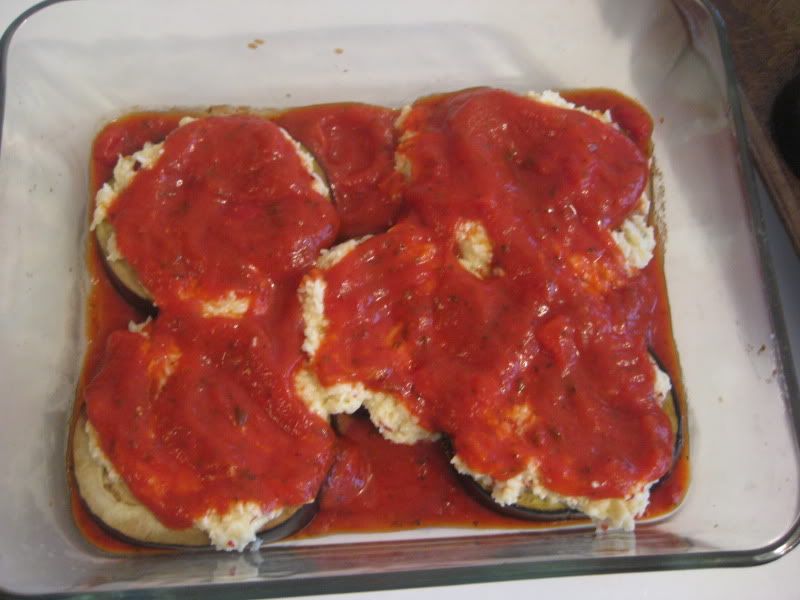
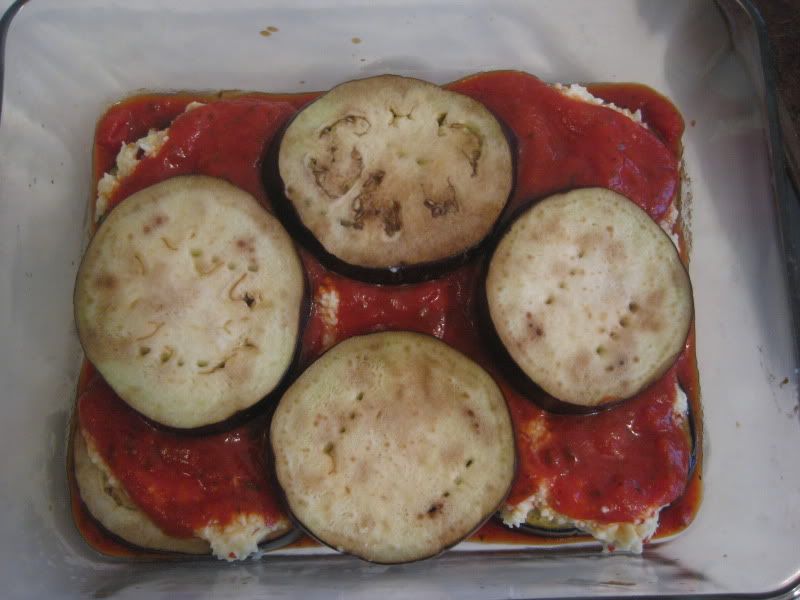
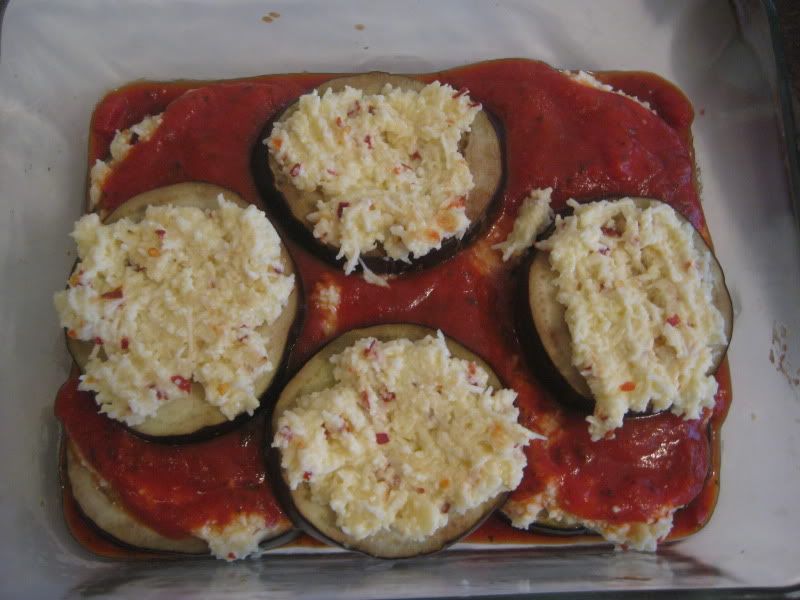
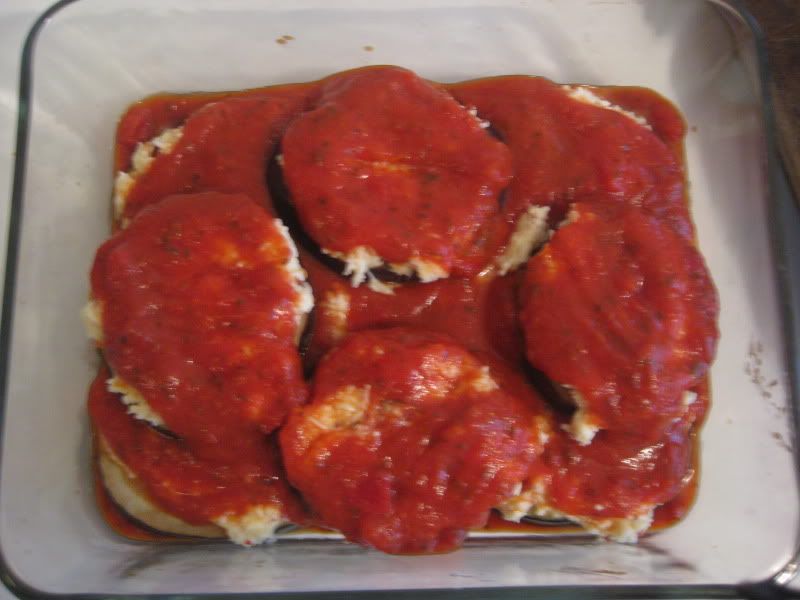
Oh, look, your eggplant is done!  Time to form the assembly line.  Okay, you've already got sauce in your casserole, you've got your eggplant nice and roasty, you have extra sauce nearby, and you have your cheesy cheeses at the ready.  Now let's just let the pictures do the talking!


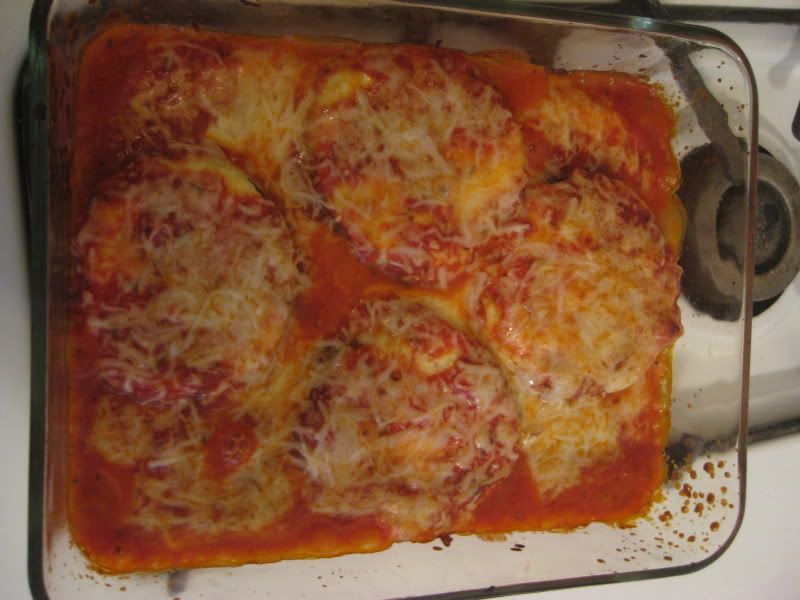
Done and done!  That last layer is just Italian blend cheese.  That guy is your egg timer... when he turns nice and golden brown and bubbly, your Eggplant Bake is ready!  So pop that guy right back in the 350 degree oven, and give it roughly 10-15 minutes.


Whoa!  That just gets me drooling all over again.  I actually would have liked for this to get a little more brown on top, but that would have been easily remedied by sprinkling some straight-up parmesan cheese over the whole thing, which I did not have on hand.  Still tastes wonderful!


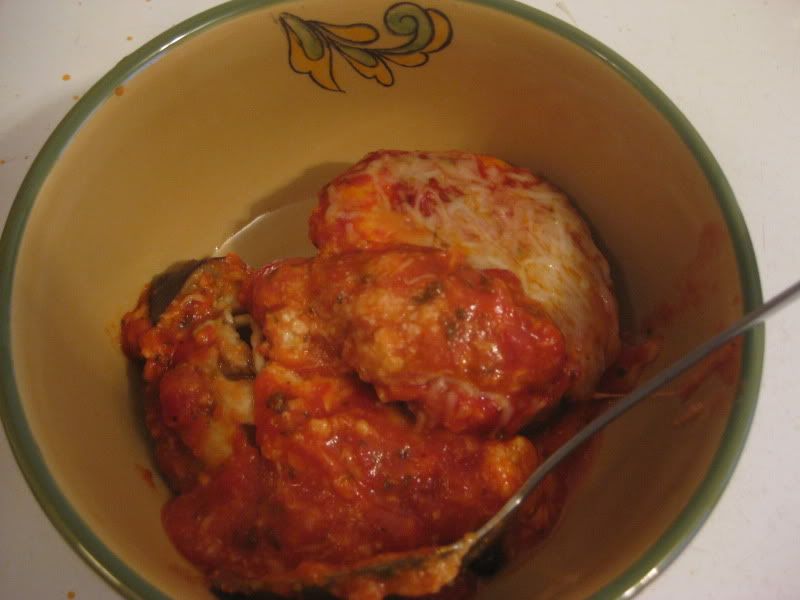
Okay, it might look like slop, but in my opinion, most good foods do.  The eggplant was so tender, I ate this with a spoon.  This would go marvelously with some steamed broccoli or a big green salad, but I was in a hurry so I shoved half of this into a mini pita and went to town.  Leftovers make great sandwiches, by the way!

Okay folks, I hope if you're an eggplant lover this has inspired you to revisit an old friend, and if you're eggplant-suspicious, maybe this recipe will open new doors of purple fruit-veg heaven!